With our architecture and hardware selected, and our homelab designed, let’s go ahead and build a homelab to experiment with!
I’ll be using Virtualbox as my type-2 hypervisor example, and Proxmox as my type-1 hypervisor example, You can view the Proxmox guide here.
Tools & Images
Hypervisors
Proxmox
VmWare Player
Virtualbox
You can get Windows Evaluation Licenses here:
Windows Server 2022
Windows 11 Enterprise Evaluation
Linux VM’s and Images
Kali VM
Ubuntu Desktop
Ubuntu Server
PfSense
Splunk
Splunk Enterprise Download page
Virtualbox
The first thing you want to do is head over to the Virtualbox download page, and download the Virtualbox installer for your designated architecture type.
Launch the installer, and follow all the Virtualbox defaults. Make sure to install all the network adapters and winpcap when prompted.
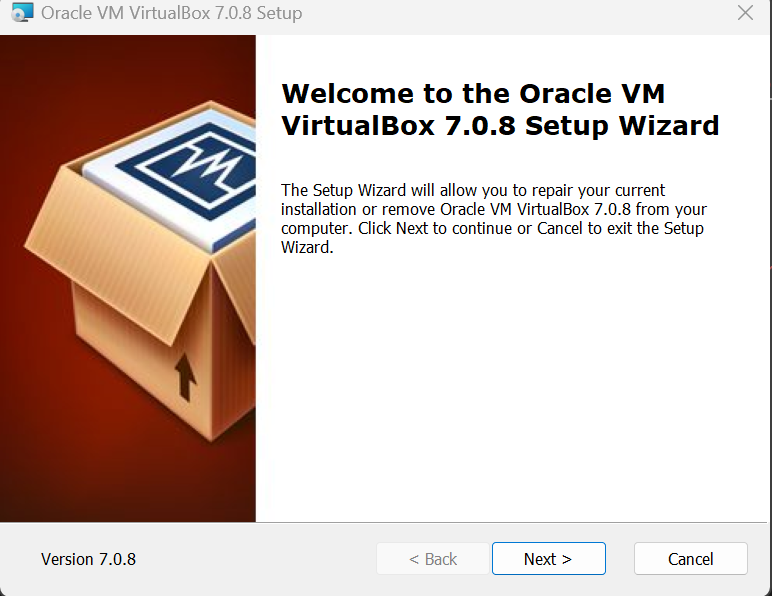
After installation, launch Virtualbox and we can begin creating our virtual lab.
Pfsense
We’ll first be installing our PfSense firewall software, so be sure to grab the PfSense iso linked above. You may need to extract the iso file from the tarball(archive) provided by the PfSense download site.
Launch Virtualbox and hit “New” to create a new virtual machine.
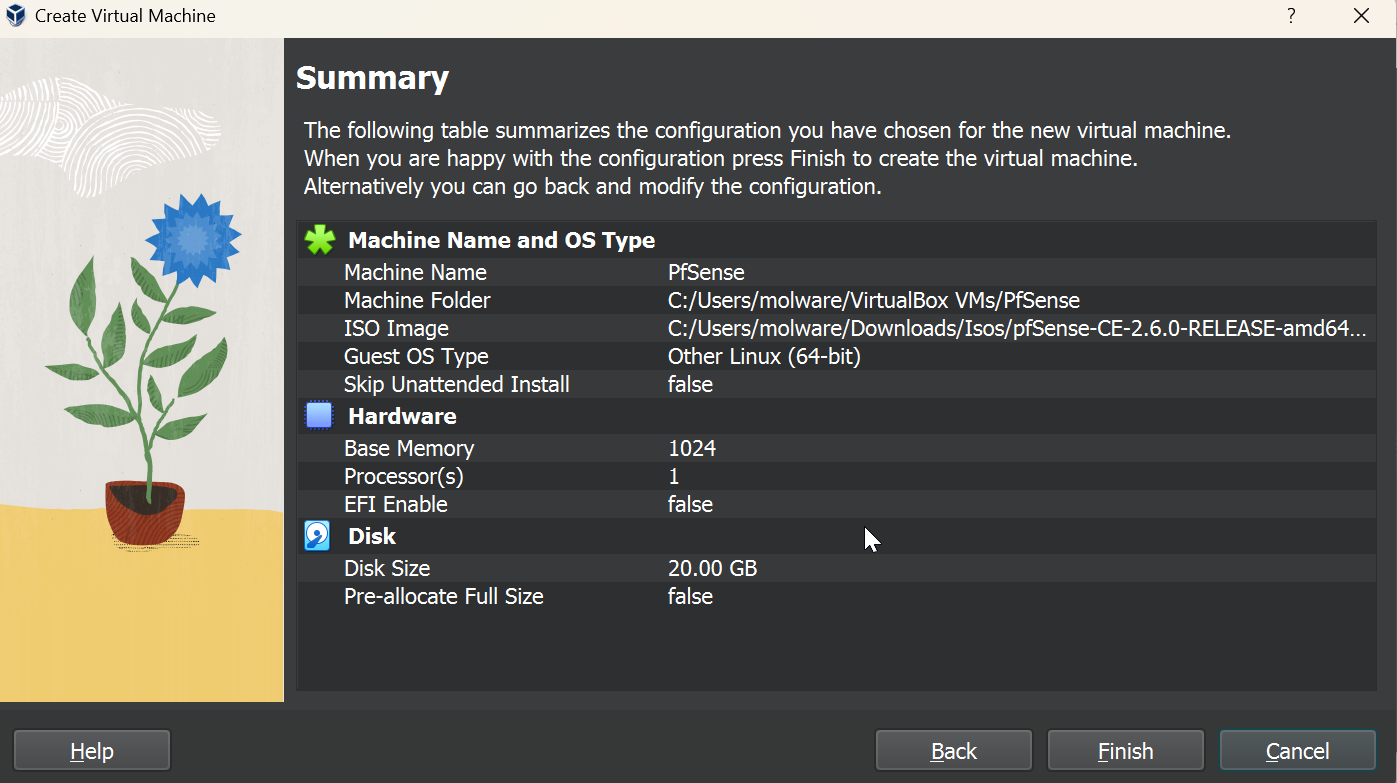
Use the following settings to create your VM. I’ve created this VM with 1GB of RAM, 1, CPU and a 20 GB hard disk.

Once the VM is created you can launch the VM to start installing PfSense to your virtually created hard disk.
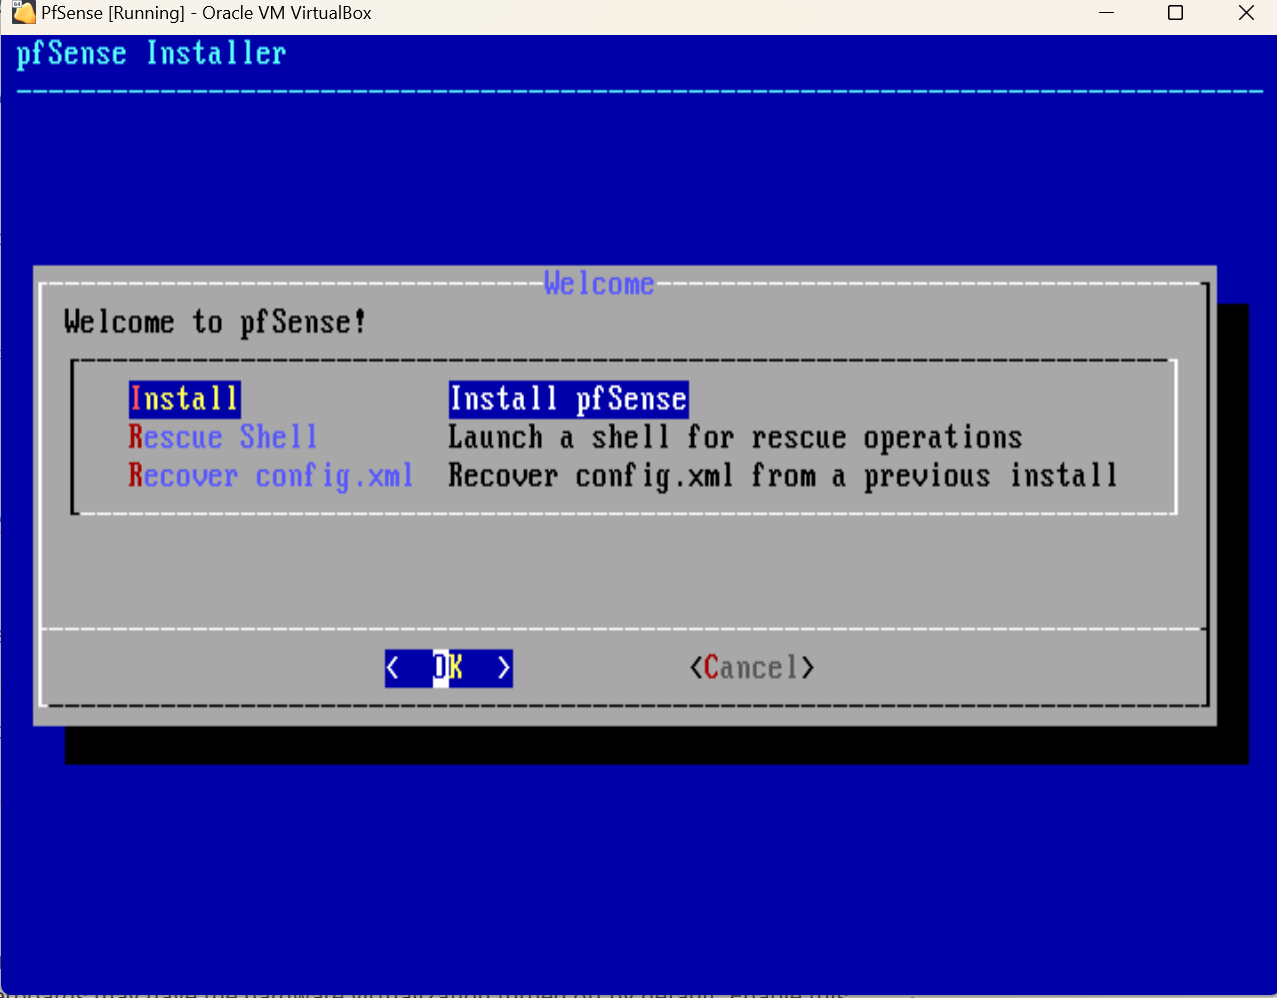
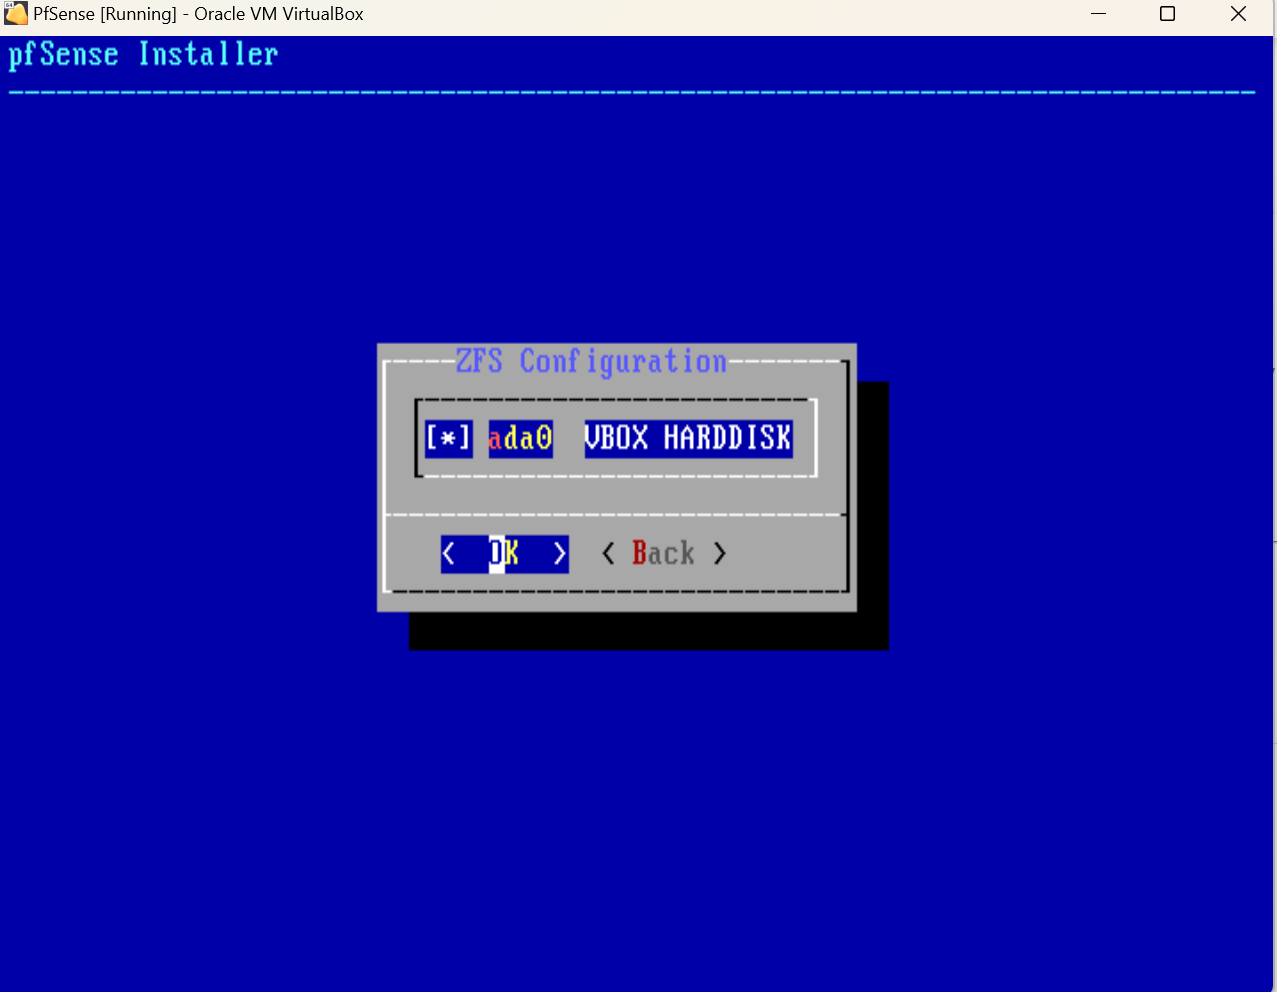
Follow all the defaults ensuring that you hit space bar to select the Virtualbox harddisk you intend to install PfSense on.
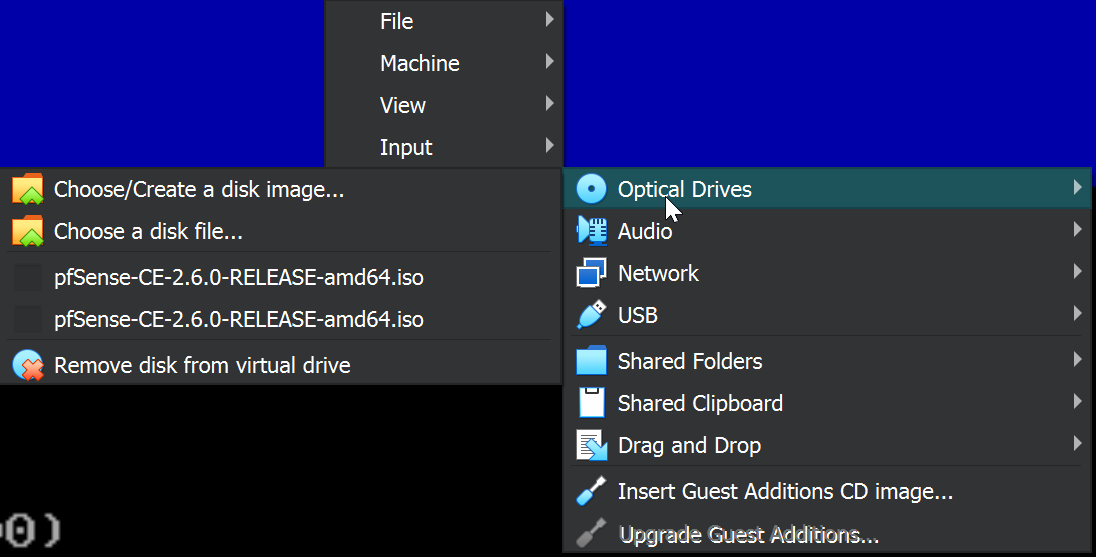
After installation is complete, PfSense will ask you to reboot. If you choose to reboot, PfSense will try to boot the iso again instead of the PfSense that’s installed. You should remove the PfSense iso from the VM before rebooting. You can use “Ctrl + Home” to access VM settings. Navigate to Devices –> Optical Drive –> Remove disk.
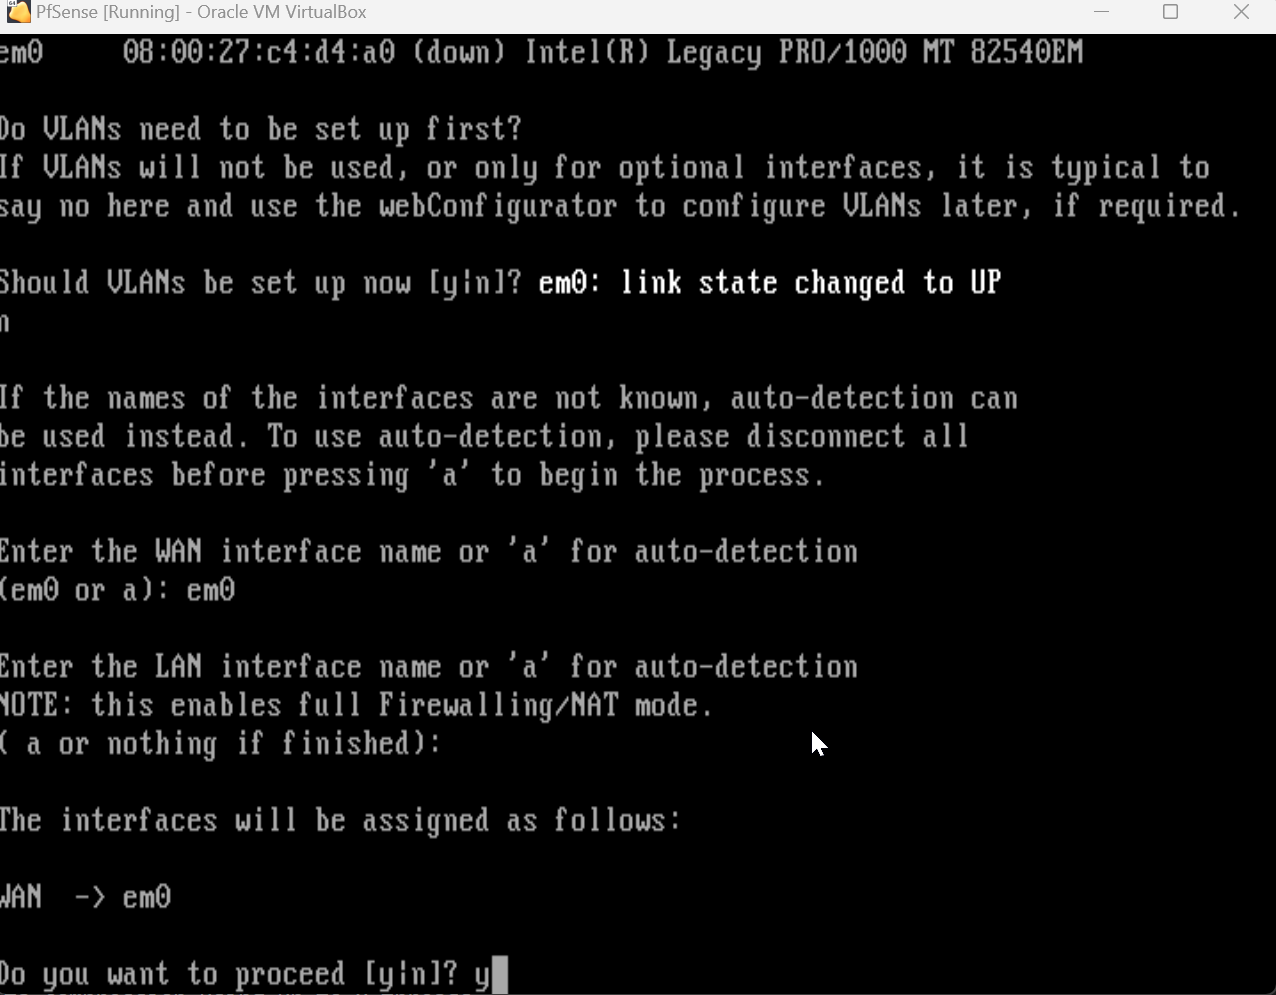
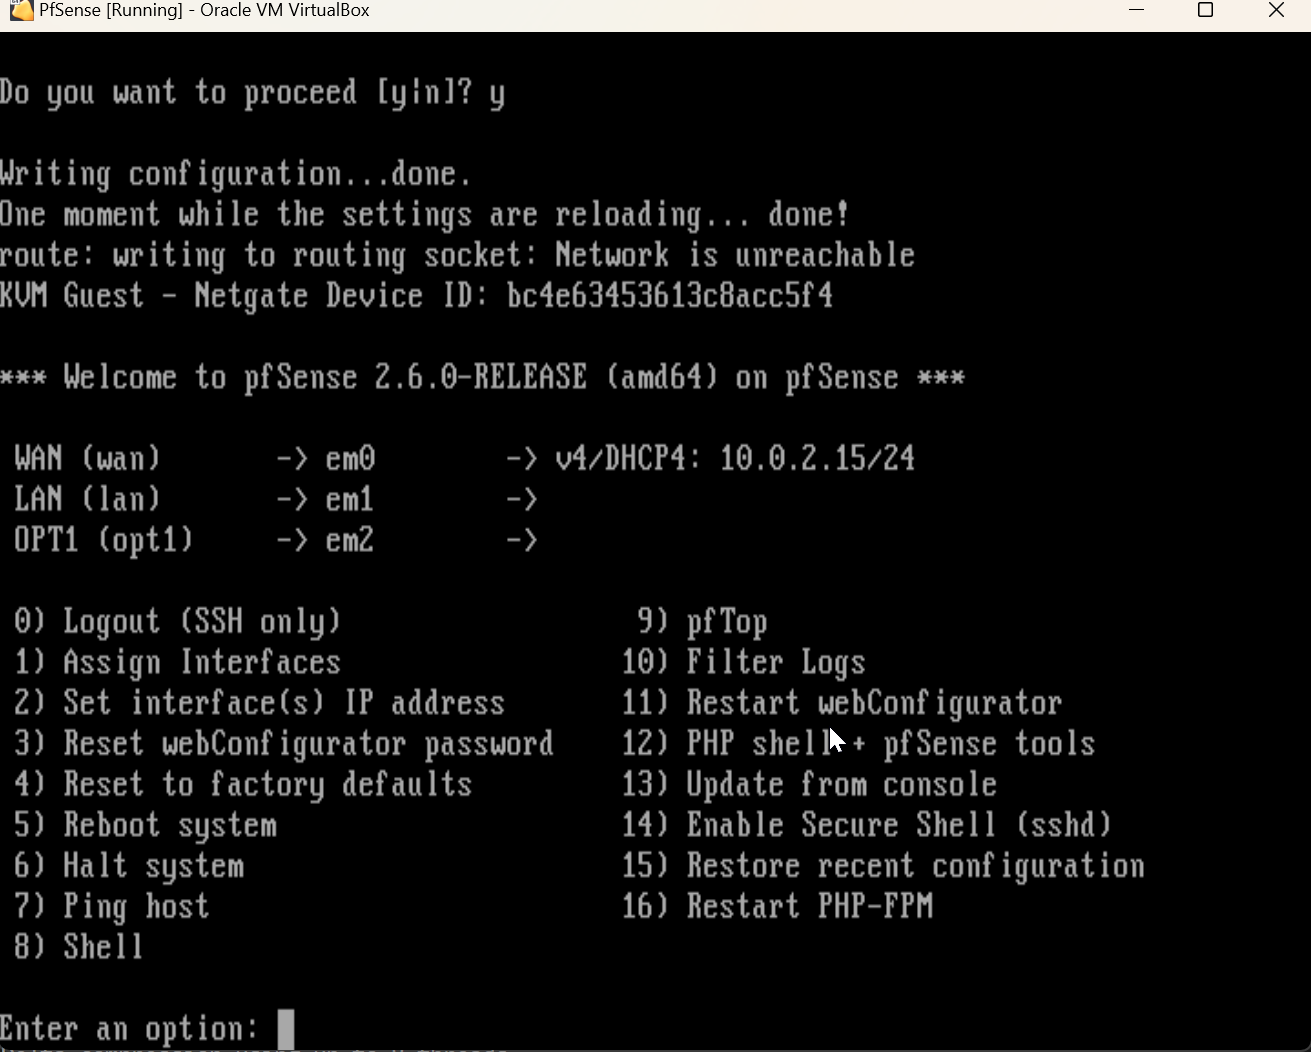
When the PfSense VM starts up there will only be one NIC available which is intended. We need to configure the WAN interface with this. It should be the only interface available so either use the auto-detection or enter the interface name(em0) that gets presented by PfSense. We’ll only have one network adapter connected so far, and that’s the default NAT adapter. The NAT adapter has the ability to communicate outbound to the Internet which is what we want for our WAN interface. As long as everything is configured properly this interface should have direct access to the Internet. We’ll have to repeat this step again when we attach the LAN adapters but I like to do this to make sure I know exactly which adapter is the WAN, and that it’s internet-connected properly.
We can test our WAN interface by selecting option 7 in the PfSense menu after the WAN is successfully configured. This will allow us to ping an outbound address to test for internet connectivity.

At this point, we will shut off the VM because we need to add additional network interface cards for the other LAN networks we’re going to create in our lab.
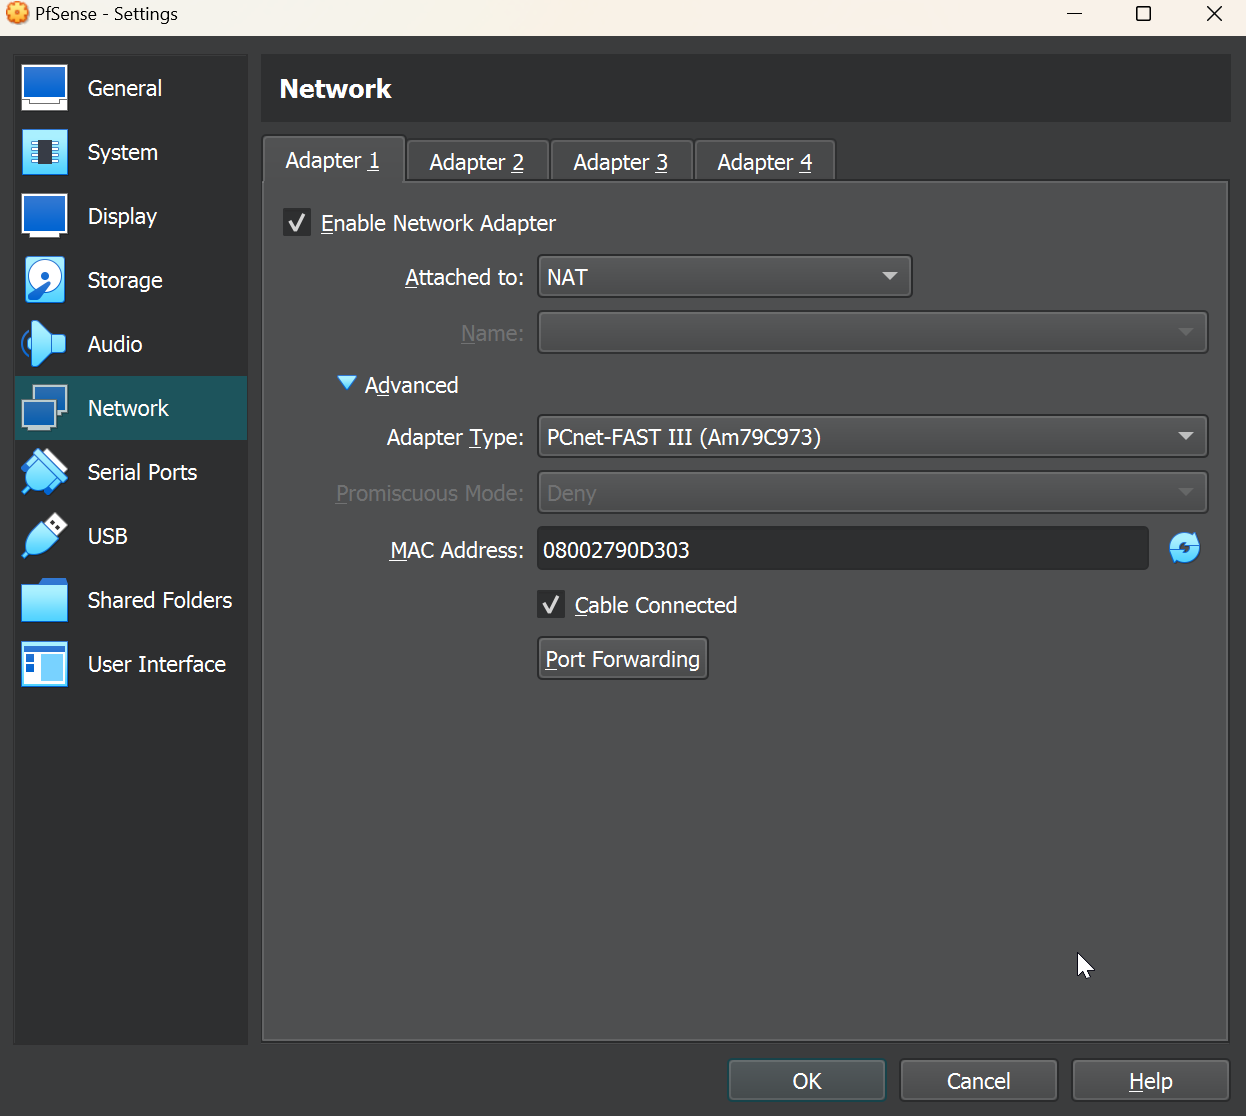
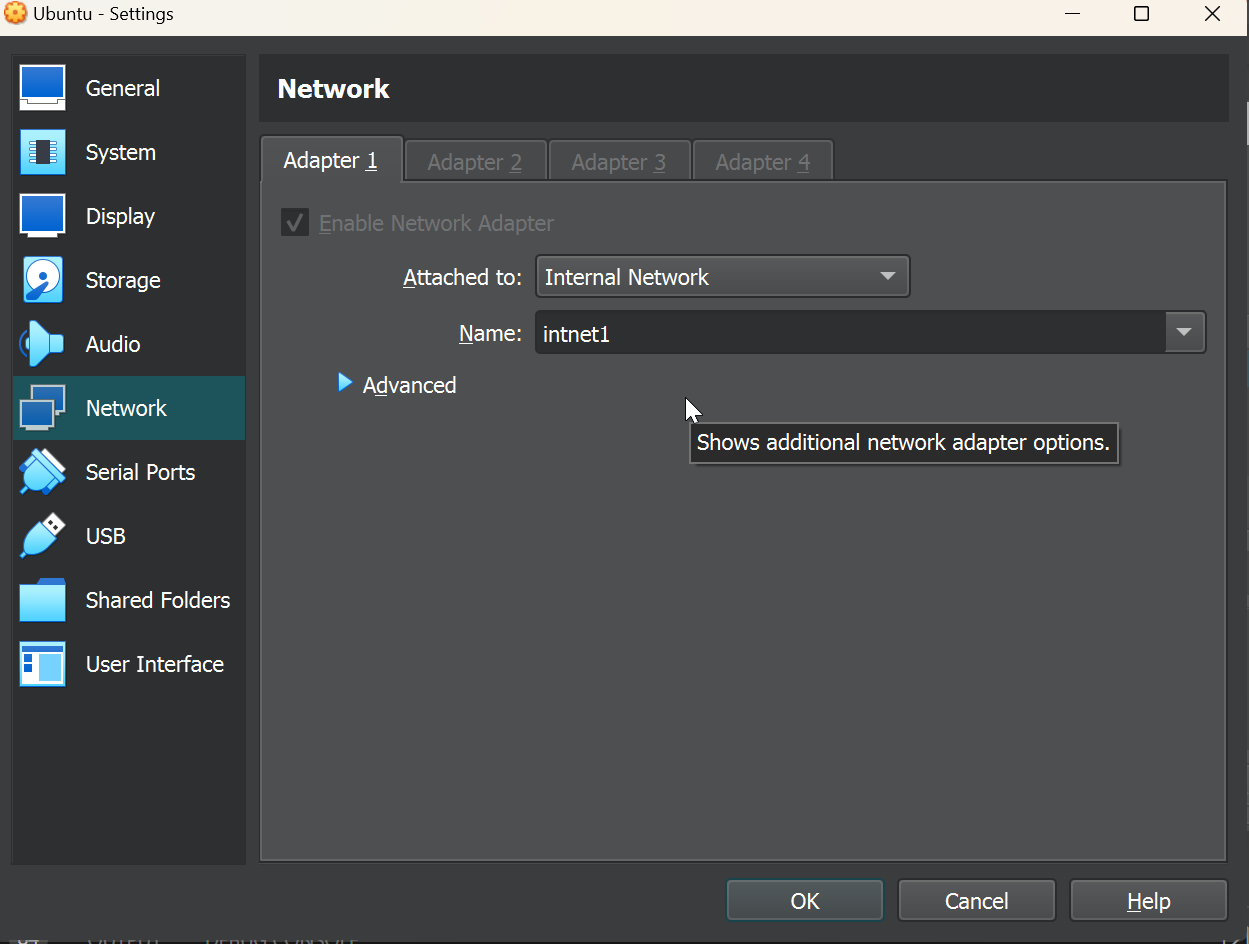
Enter the VM settings and navigate to the Network menu. On the Adapter 1 tab you’ll see that our NAT adapter is the first adapter here, and is attached.
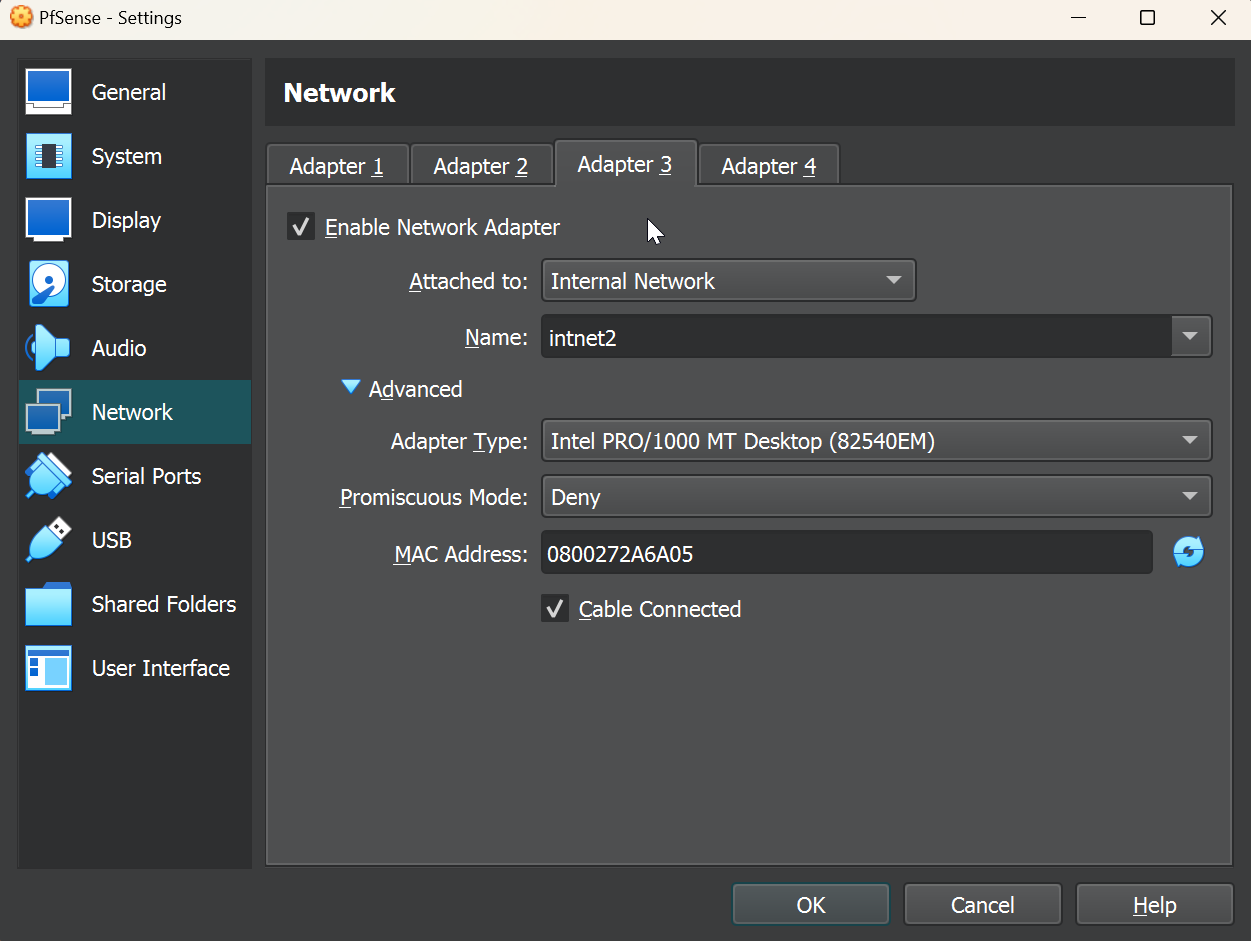
Let’s navigate to the adapter 2 tab, and change the adapter type to “Internal network.” Then we’ll name our new network adapter so we can connect other VM’s to the same network in the future. I chose the default intnet1.
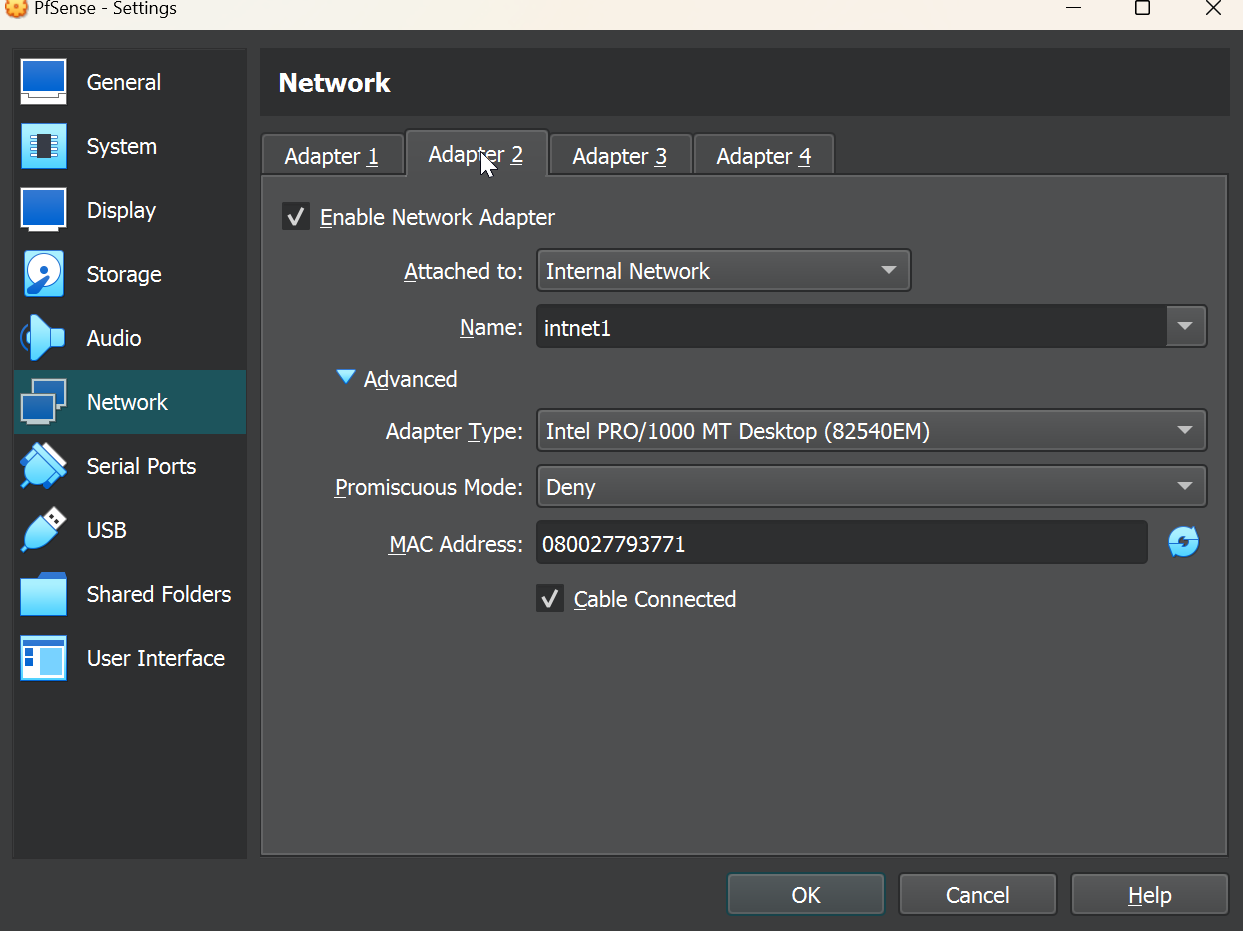
We’ll repeat the same for adapter 2 but make a unique name for the adapter 2 network adapter name. Make sure to tick enable adapter for each of the network adapters that we’ve added.
Let’s start our PfSense VM back up. Our WAN interface should be configured and working, but now we’ll have to configure the two LAN network interfaces. We can do this by selecting option 1, Assign Interfaces in the PfSense menu. This will bring us to a menu where we can assign our newly attached virtual NICs to our PfSense.
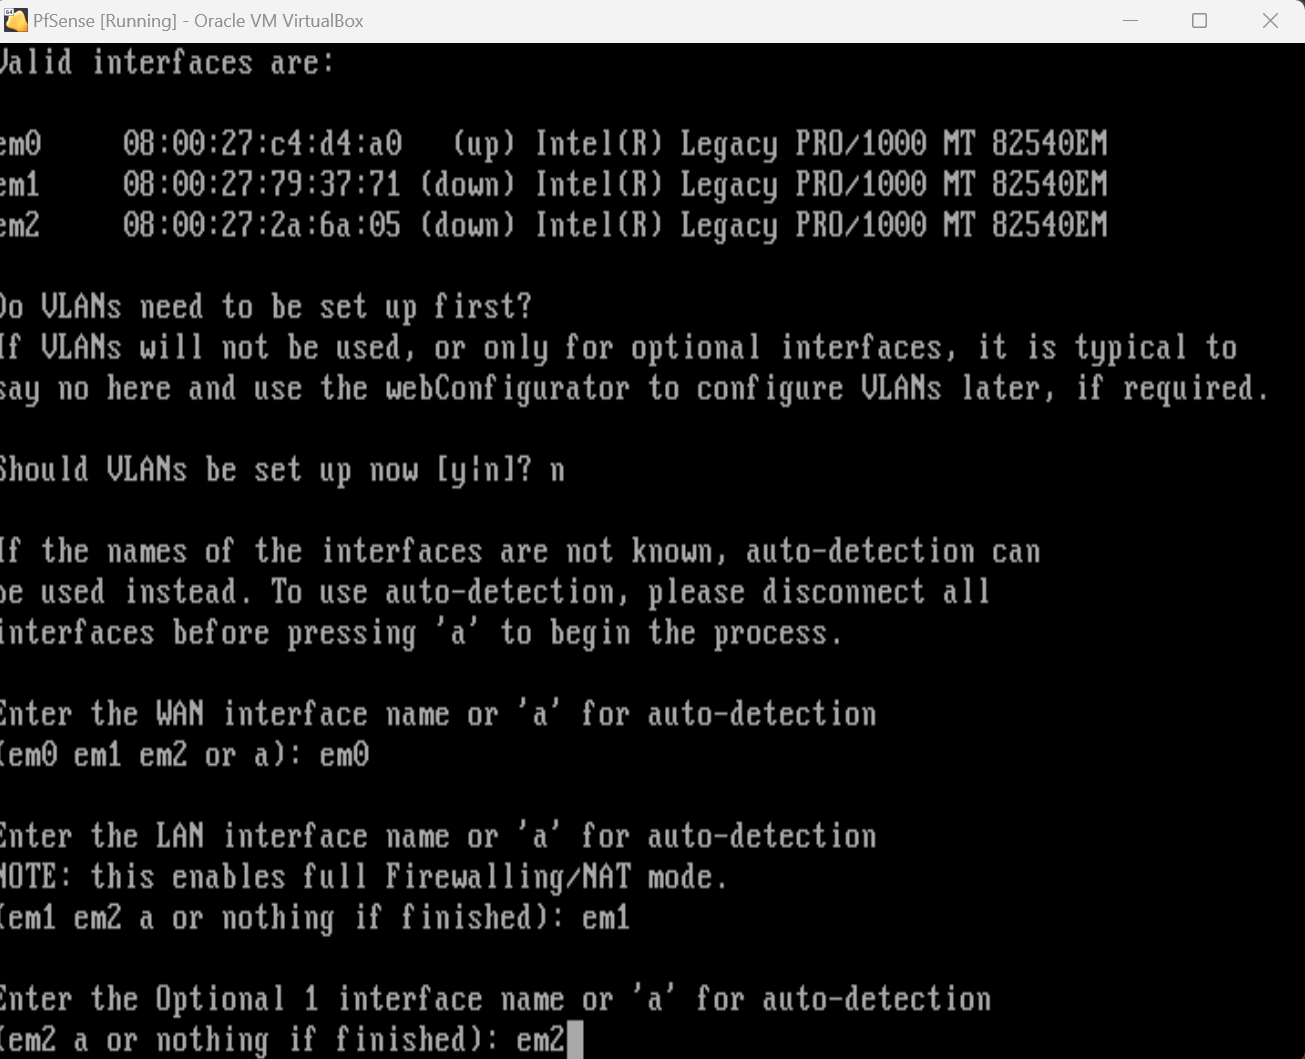
We’ll skip VLANs for now, but we’ll go ahead and assign our interfaces. We’ll select em0 for our WAN as we did previously leaving everything else as default.
We’ll select em1 as our first LAN, and em2 as our second LAN. Once done, we’ll confirm our options here, and move on to assigning IP addresses for our newly assigned interfaces.
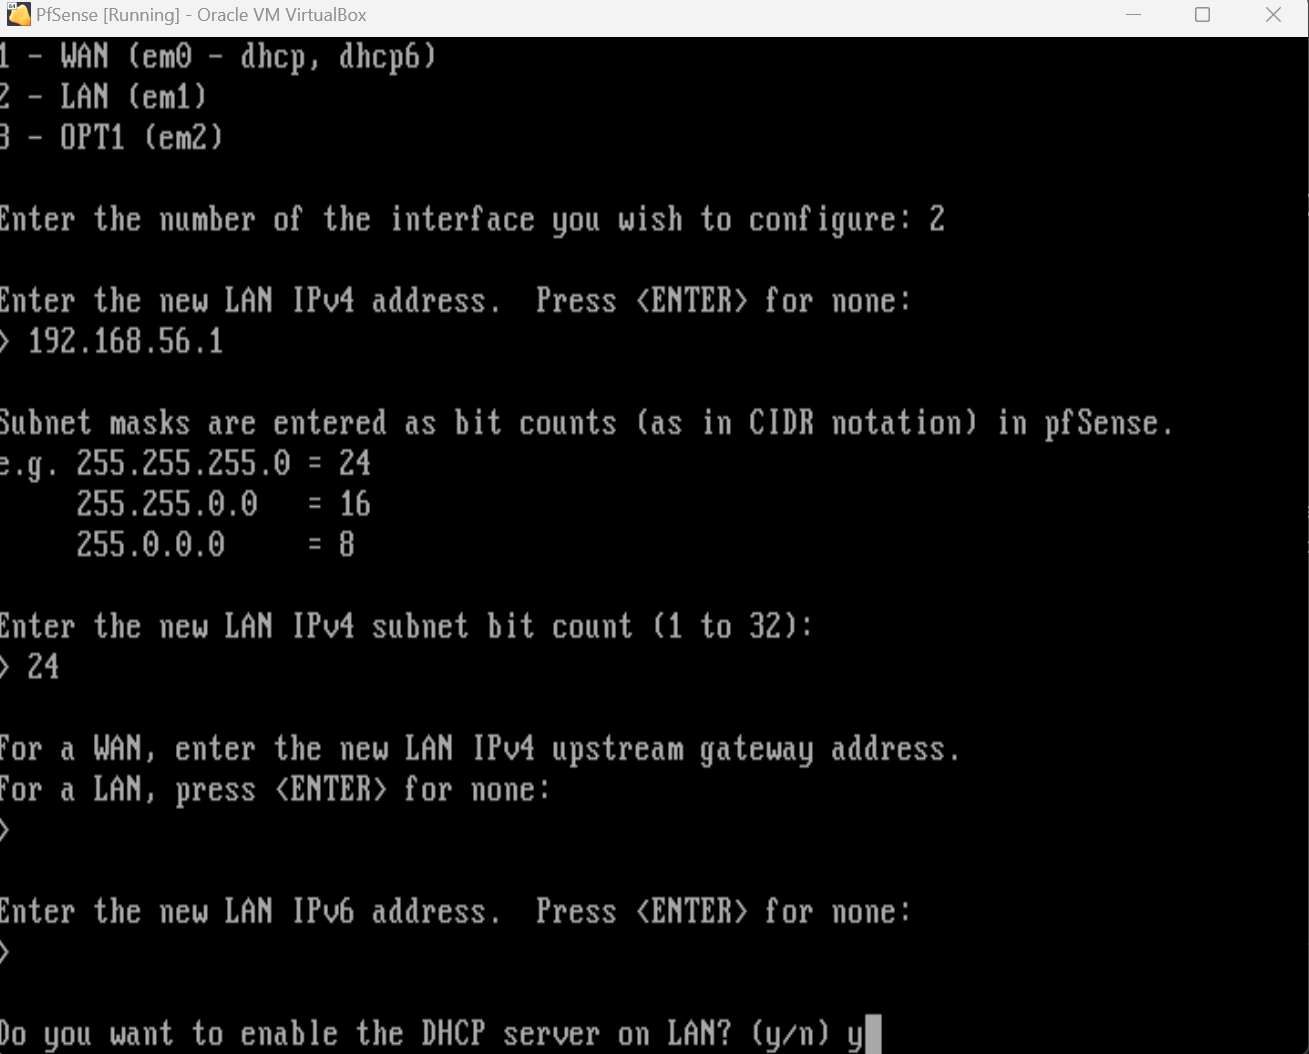
We’ll be returned to the PfSense menu and now we’ll select option 2 for “Set Interface(s) IP Address. Here we will configure the IP addresses of the two LANs.
For vtnet1 we’ll configure the following:
- IP:
192.168.56.1 - CIDR:
/24 - DHCP:
y - DHCP Range:
192.168.56.2 - 192.168.56.254
We’re setting the IP to 192.168.56.1. You can use any IP but I typically like to make the router/firewall the first IP in the network wherever possible to keep consistency across all the LANs. We’re enabling DHCP so that our PfSense firewall will automatically assign IP addresses to any VM’s that we connect to the intnet1 LAN.
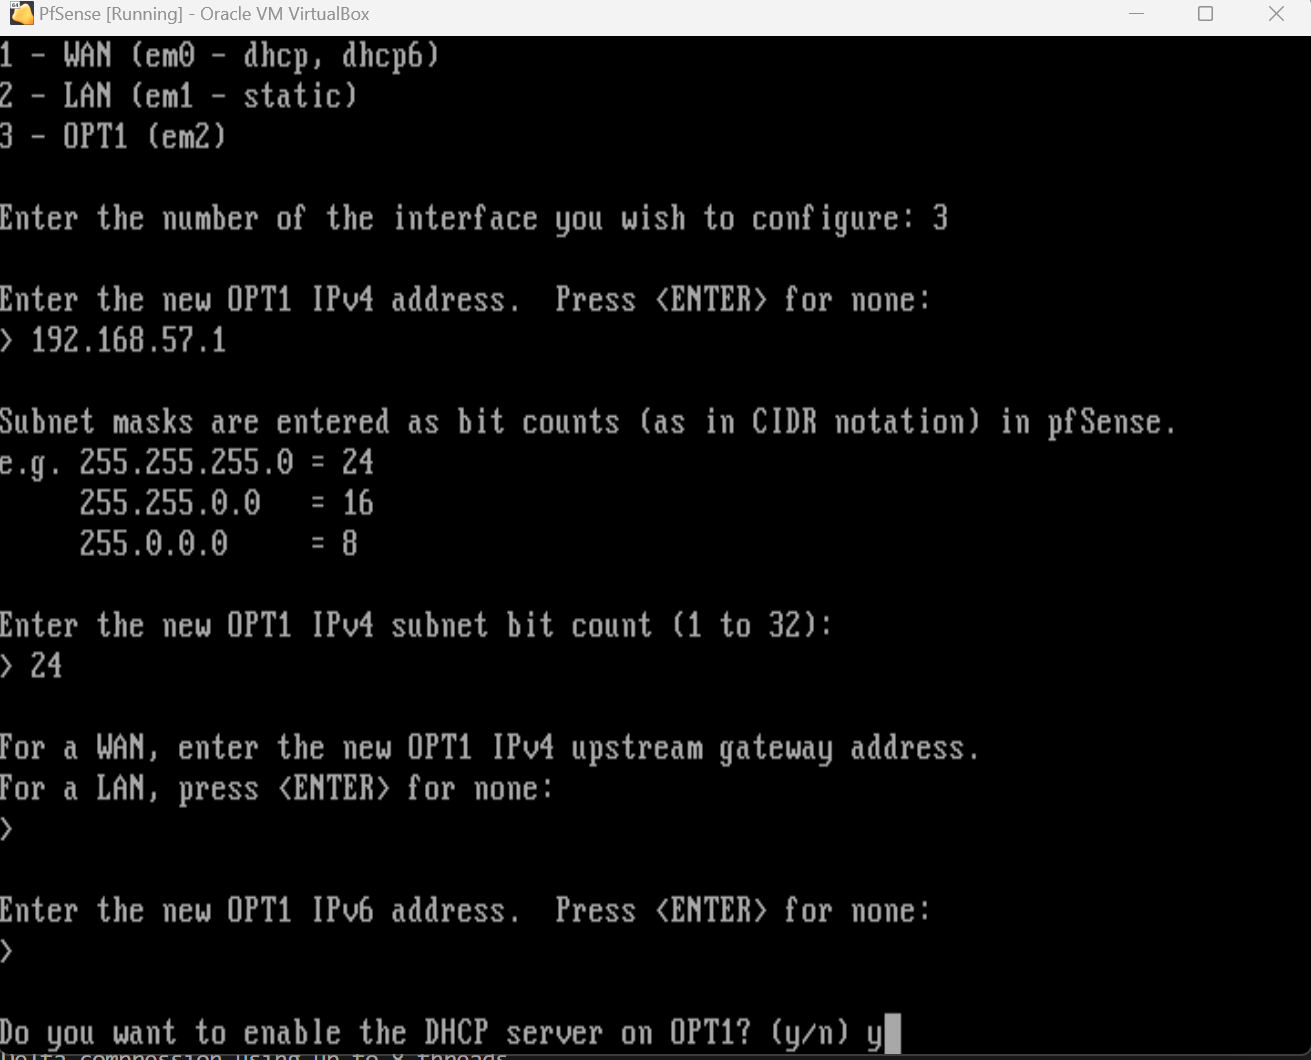
We’ll repeat the process for the 2nd LAN network, em2, as follows:
- IP:
192.168.57.1 - CIDR:
/24 - DHCP:
y - DHCP Range:
192.168.57.2 - 192.168.56.254
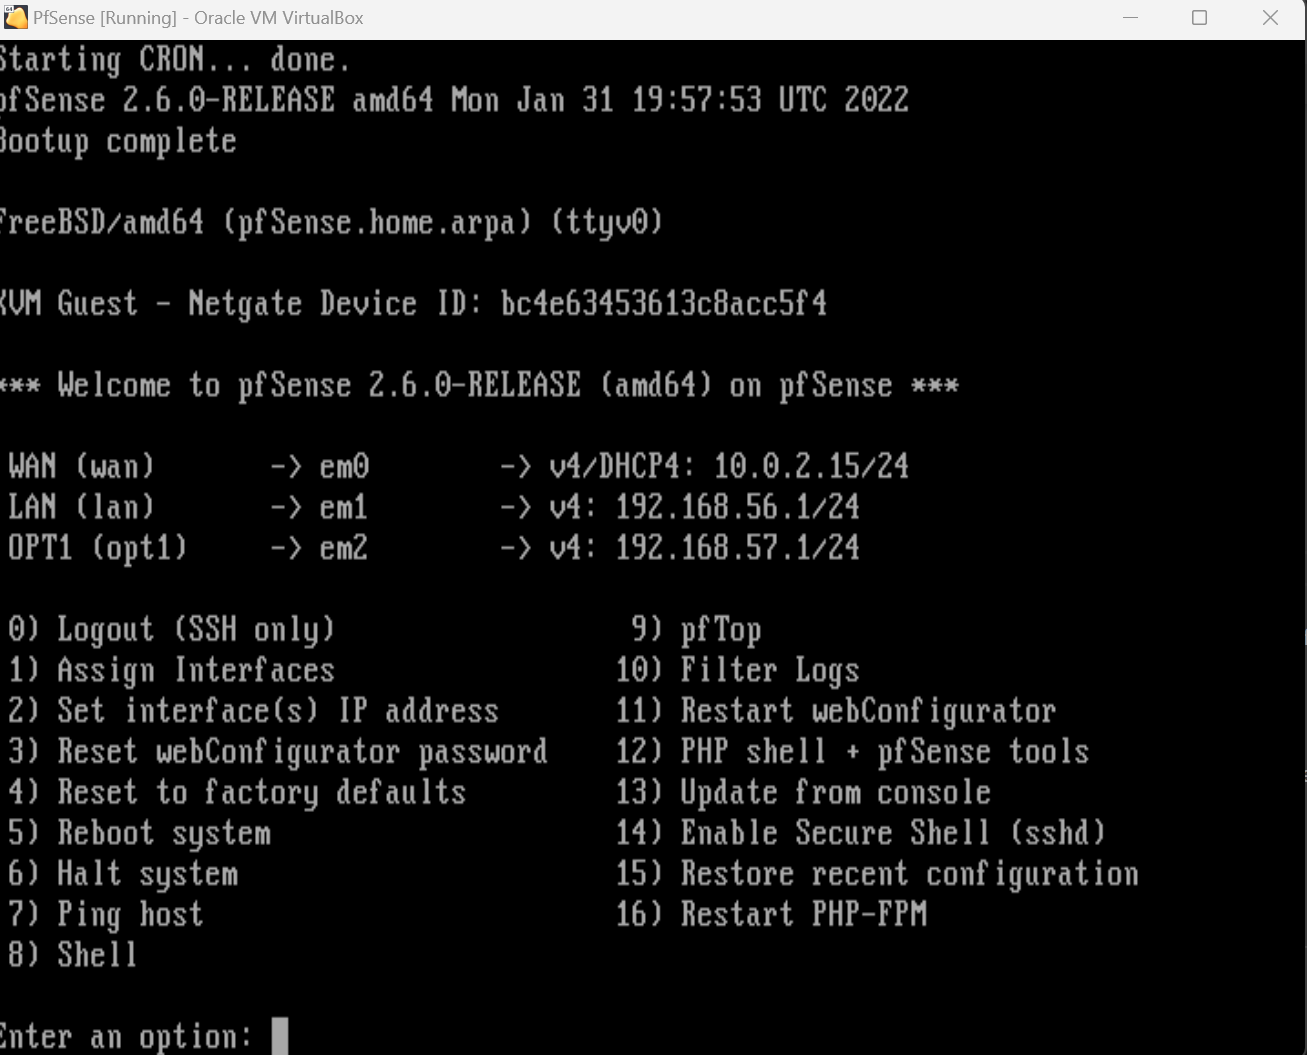
Our WAN and two LAN interfaces should be good to go!
Now’s also a good time to take a snapshot just in case we run into any issues with our PfSense VM in the future.
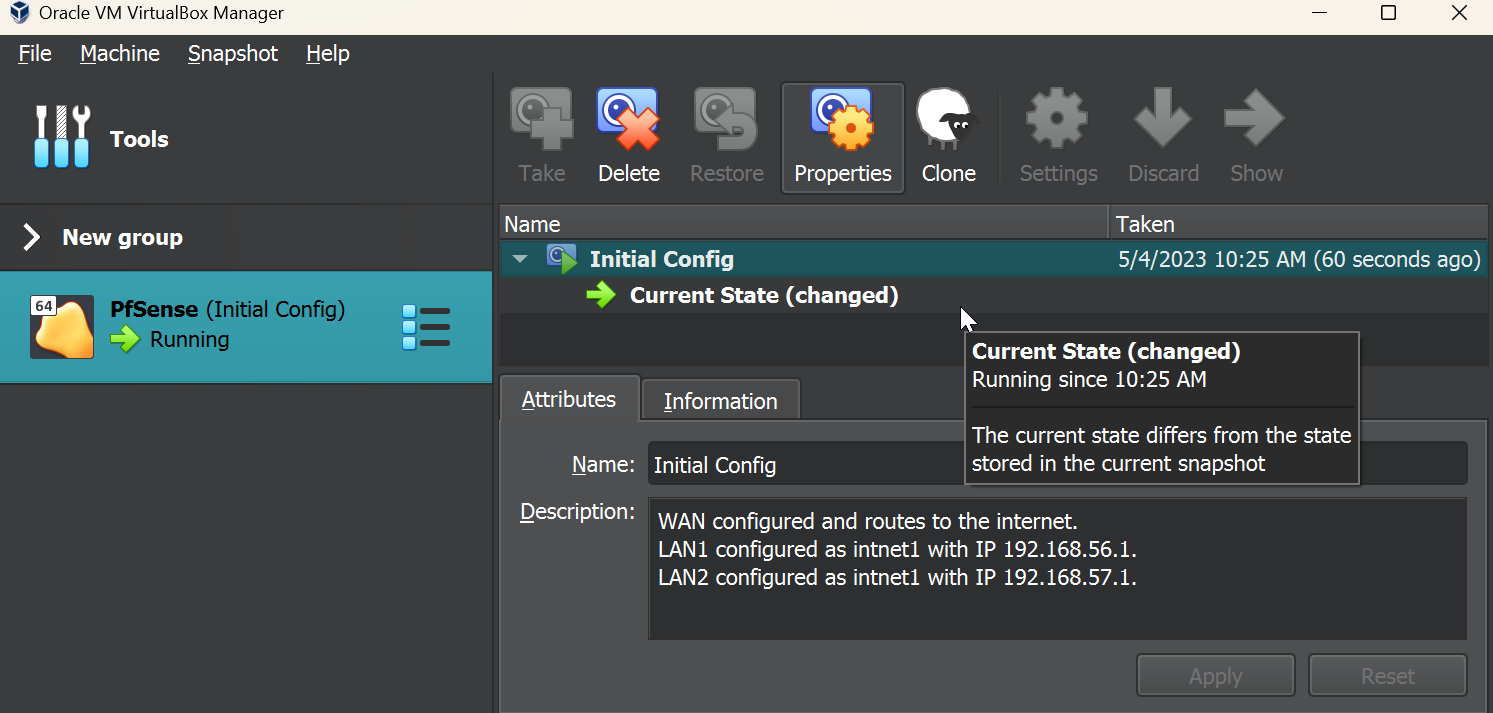
After that’s all said and done, our PfSense configuration is complete! There’s a lot more to configure in PfSense but we’ll cover that later on.
For now, we’ll move on to creating our Windows VM.
Windows VM
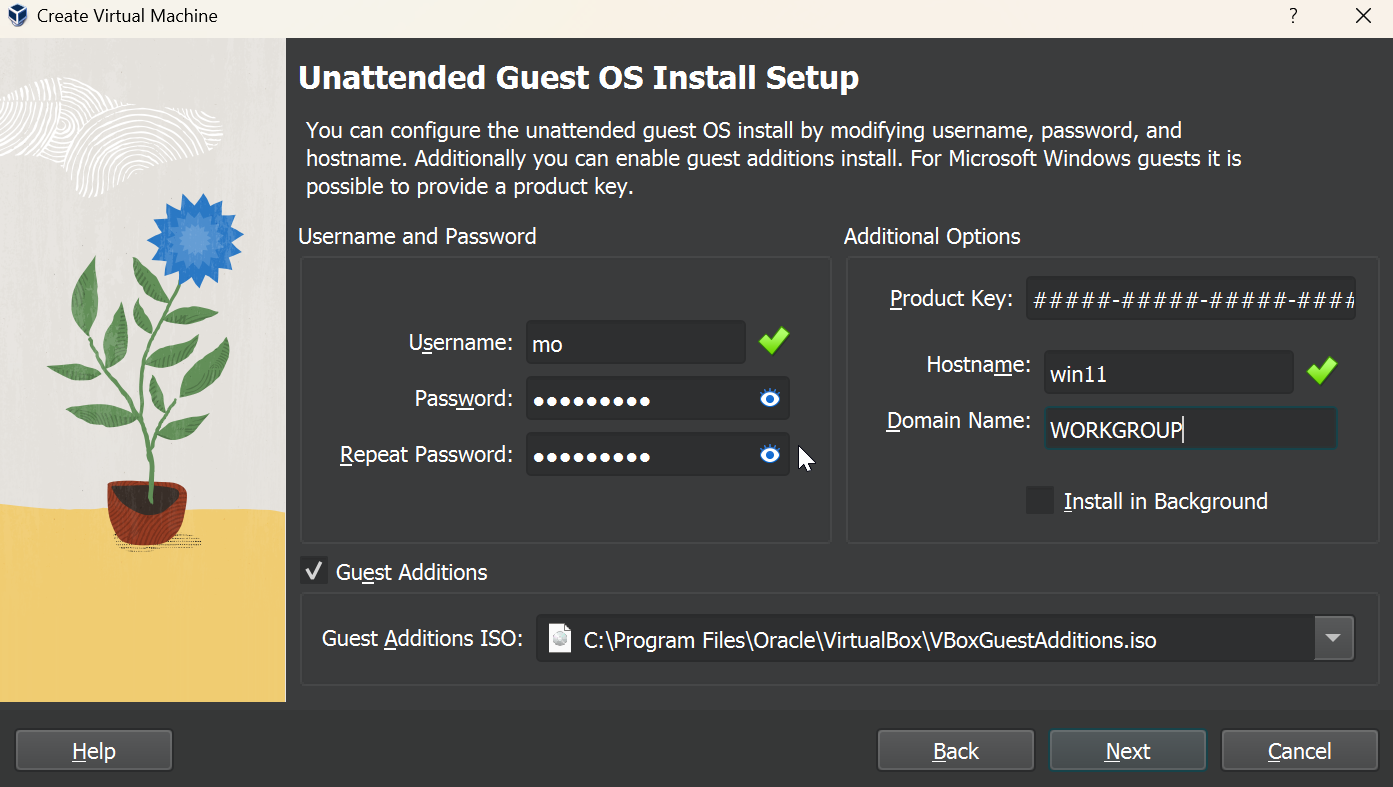
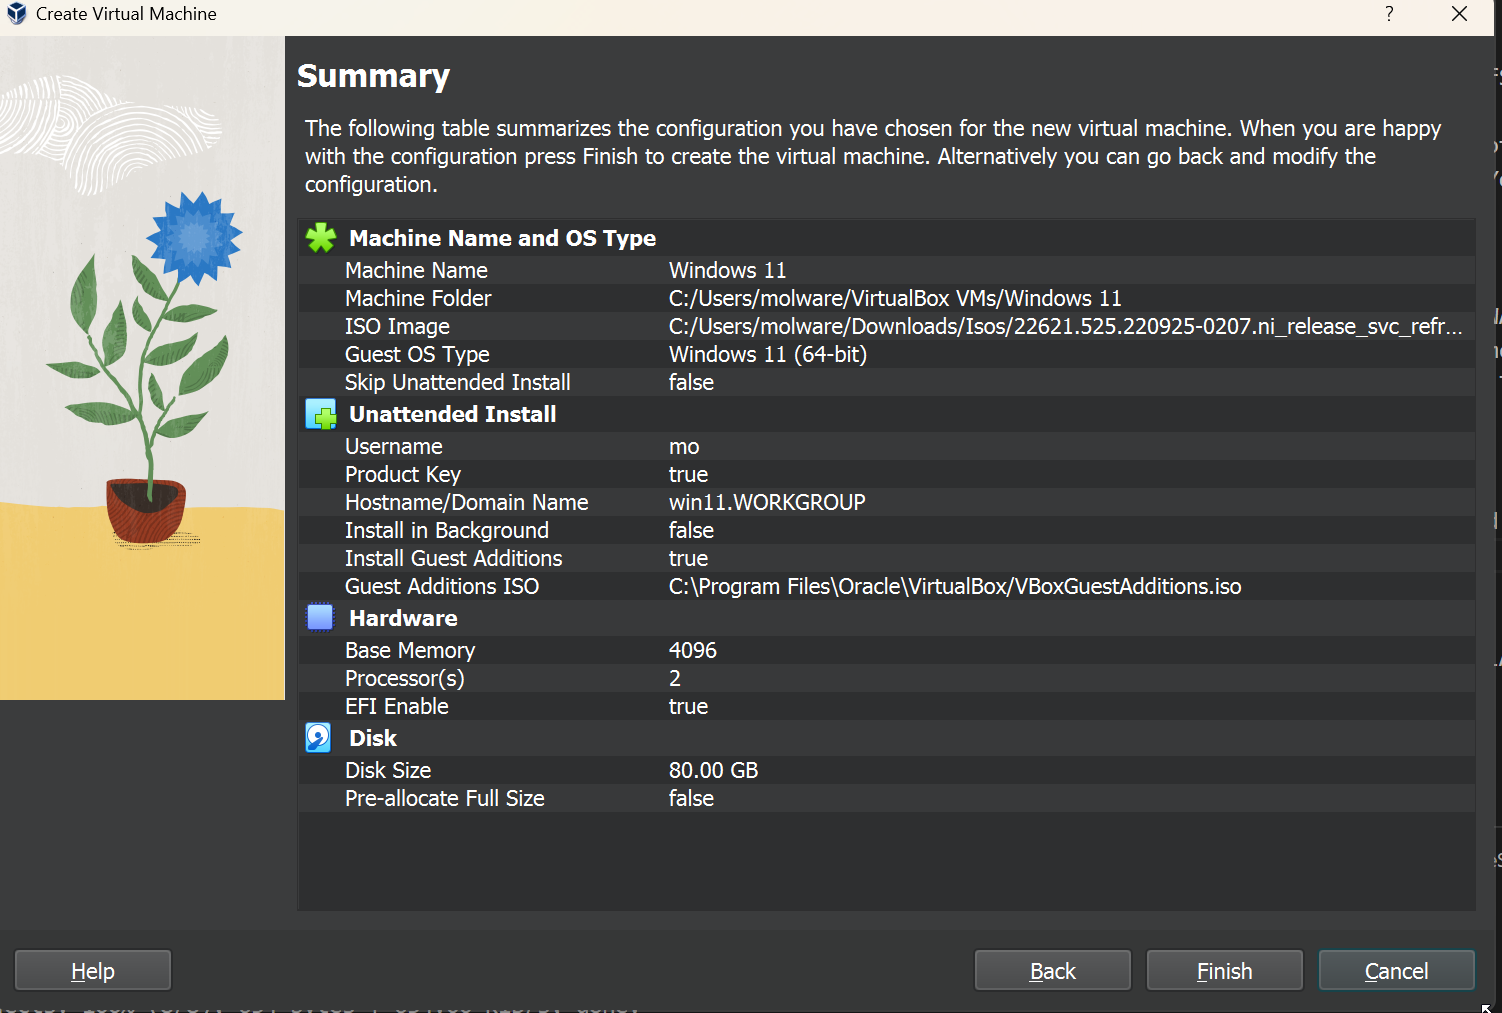
For our Windows VM we’ll go back to our Virtualbox menu to create a new VM. Assuming you’ve downloaded the Windows iso from before, we’ll load our iso and create a new name for our Virtual Machine. Virtualbox should automatically detect the ISO as Windows, and offers some nifty features like being able to create a user or automatically join the domain. We’ll take advantage and create a new user and set our domain to WORKGROUP as we don’t have a domain to join at the moment. Sometimes this utility breaks the Windows installer so if you want to do things the old-fashioned way, go back to the previous screen and uncheck “Unattended Install.”
For our VM resources, we’ll dedicate 4GB of memory, 1 CPU, and an 80GB hard disk. Adjust accordingly, but note that Windows 11 needs some significant resourcing in comparison to its predecessors.
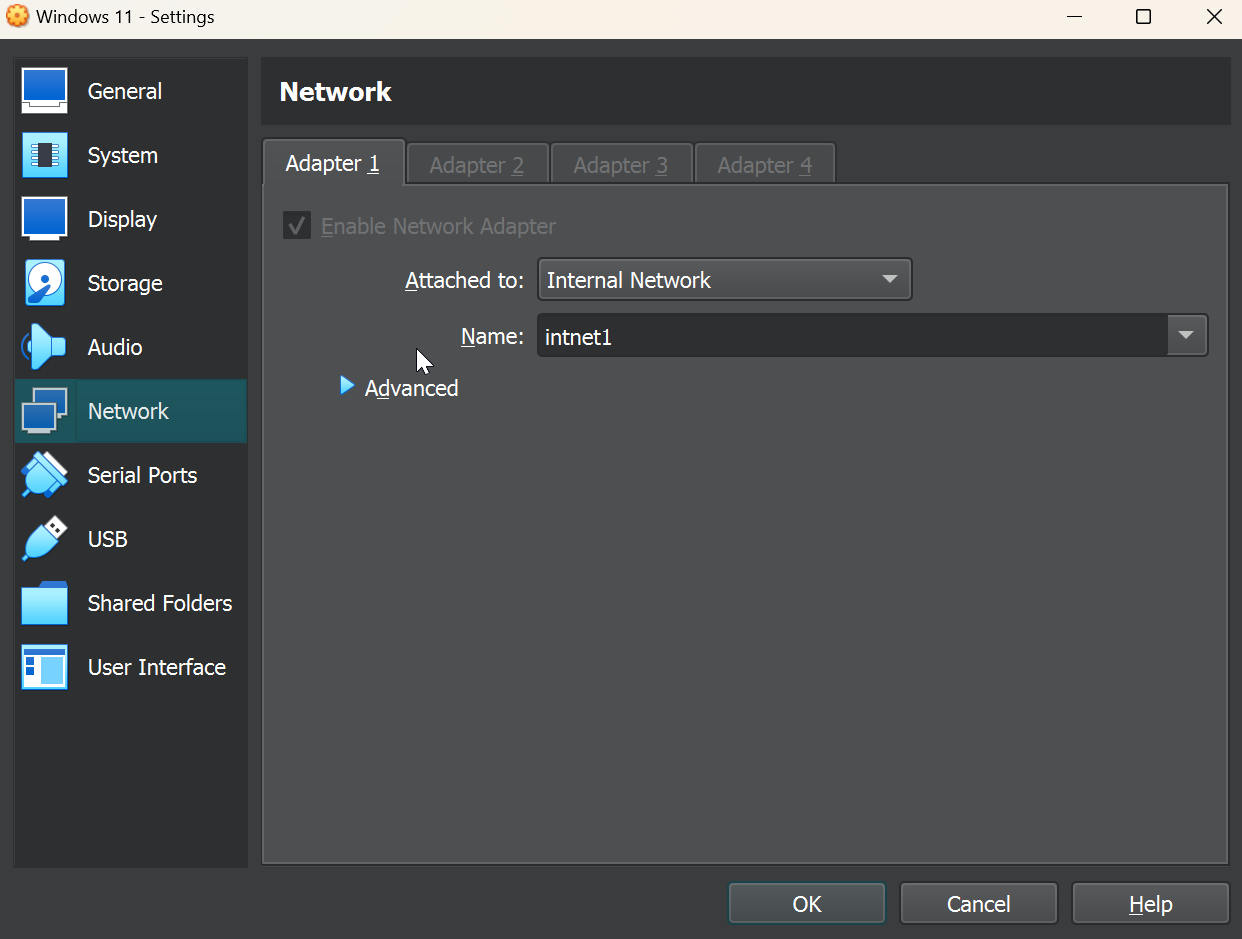
After confirming our settings, before starting our VM let’s add the correct network adapter to make sure that Windows connects to our firewall. We can also do this after the installation is complete, but it’s not a bad idea to get that situated early.
Navigate to the Windows VM settings, then the Network menu. Change the adapter for adapter 1 to Internal Network and then use the dropdown to select one of the two LANs created previously. For this VM I’ll select intnet1 which maps to LAN1 on our PfSense VM. Save the settings and install Windows.
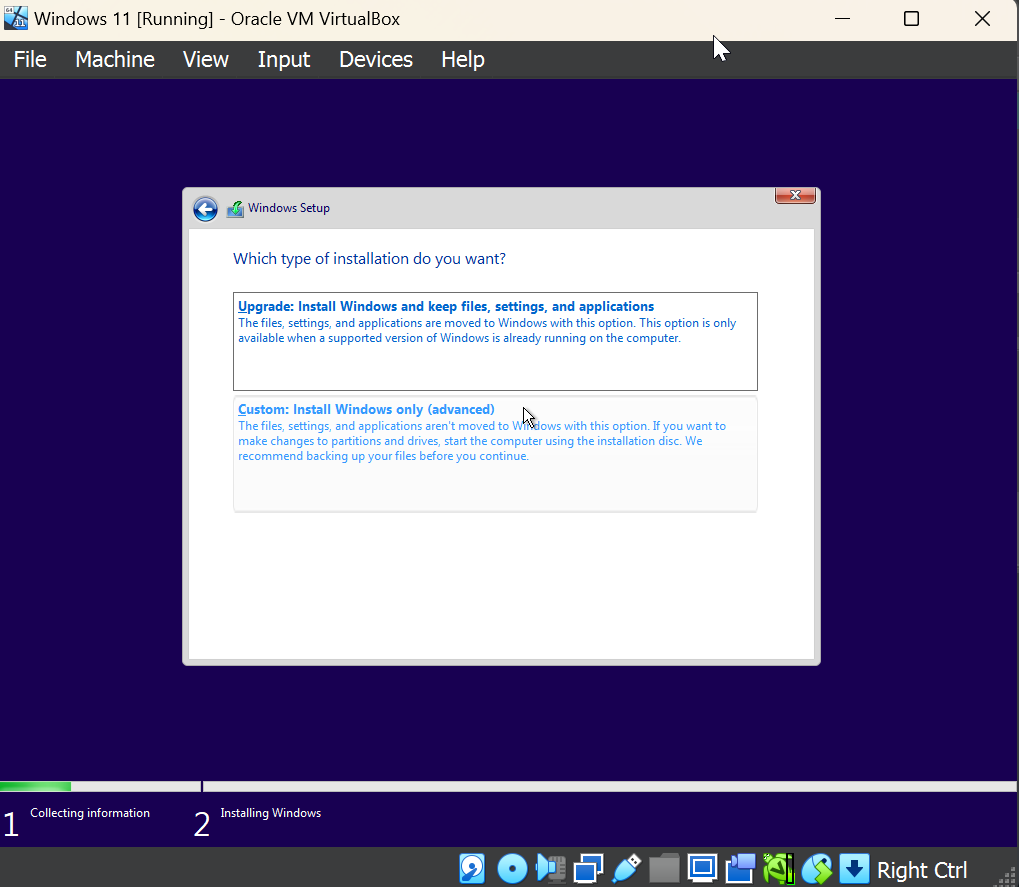
Once the Windows ISO boots up you’ll be presented with the installer screen.

Follow all the defaults until you reach the “What type of installation do you want?” screen. You should select the second option, “Custom” since we are not upgrading an existing Windows Installation.
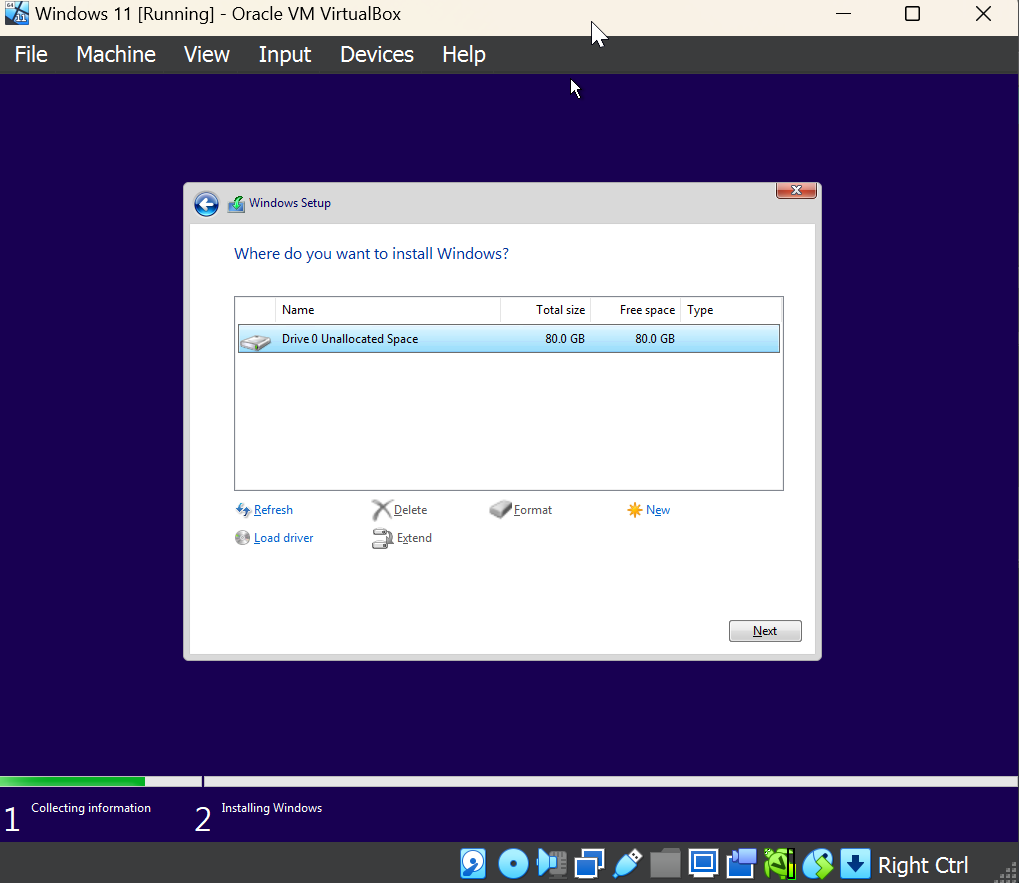
The next screen should ask you where you should install Windows, and this should be the Virtualbox Hard Disk you created when you installed Windows. Select the disk and hit “Next” and your Windows should install successfully!
After getting Windows 11 installed we’ll launch the VM and follow the installation steps. If you downloaded a Windows 11 Enterprise image you’ll need to select the ‘domain join’ option to create an offline account.

Once setup is complete, you now have a fully ready Windows 11 VM! The VM is connected to the LAN of the PfSense firewall we configured earlier so it has an outbound route to the internet via the PfSense WAN.
Now’s also a good time to take a snapshot of our Windows VM via the snapshot menu. This helps us revert to a clean state in case anything goes rung with our VM. Additionally, it resets the timer on the evaluation license of our Windows VM so that we can use it for testing after the 90-day evaluation is up!
Since this is our first VM on our LAN, we can use this VM to navigate to our PfSense web interface, by browsing to the LAN IP we assigned earlier.
https://192.168.56.1
This will bring us to the PfSense admin page where we can log in with the following credentials:
Username: admin
Password: pfsense
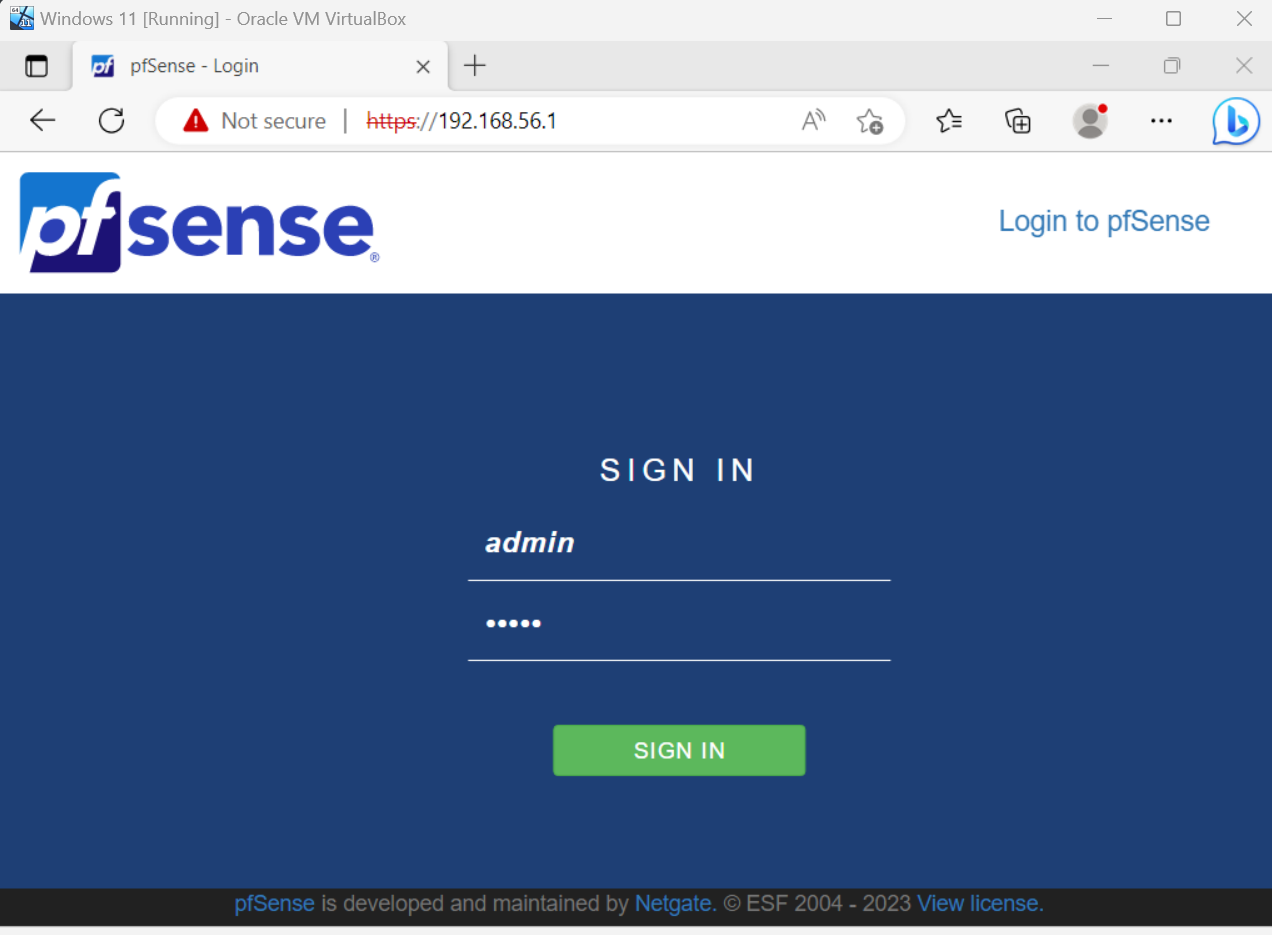
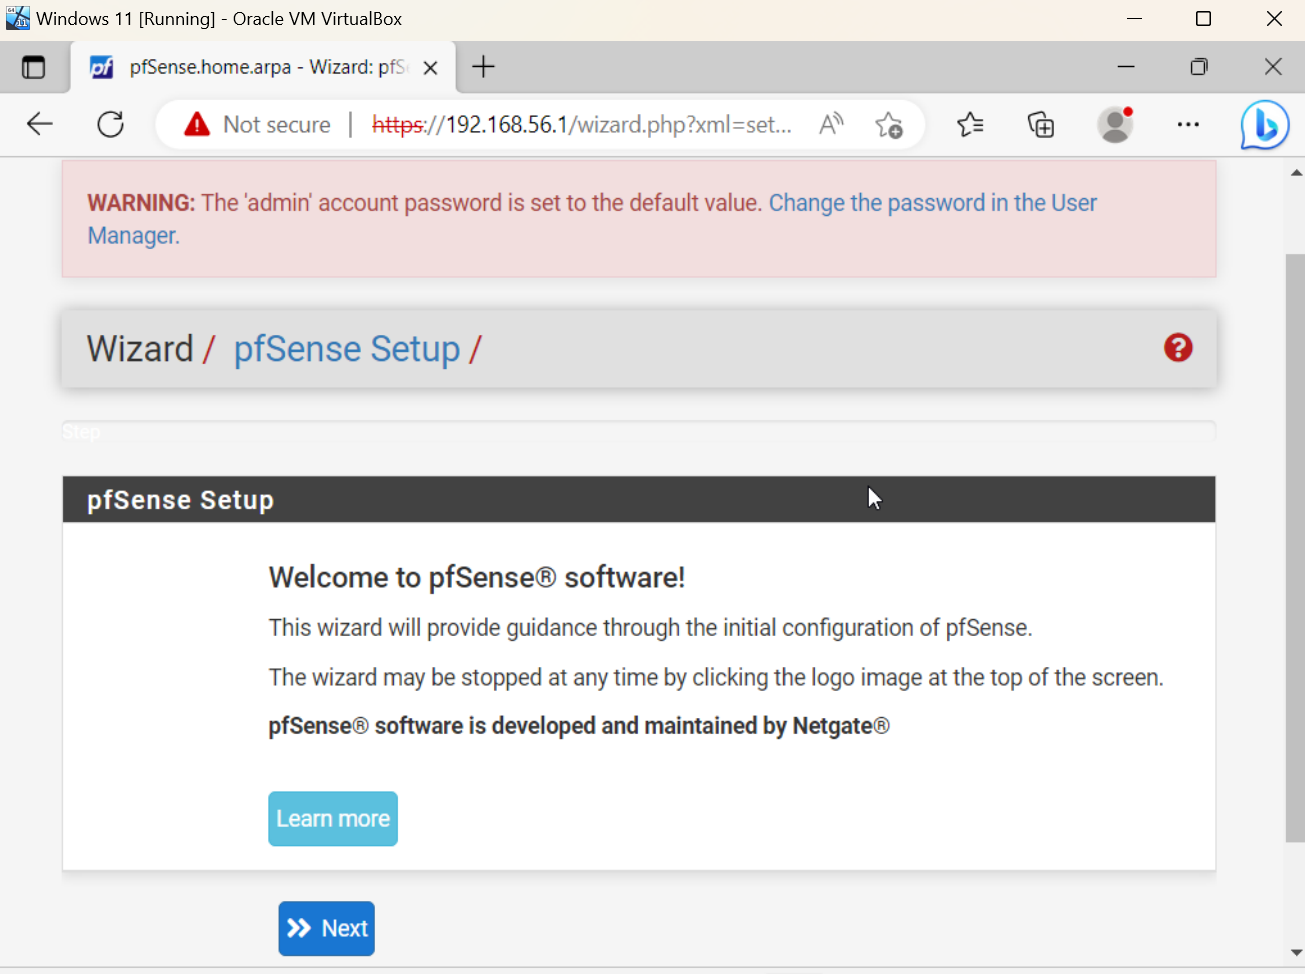
We can now administer and configure our PfSense firewall via the Web console. Here is where we can create firewall rules to segment parts of our lab, install plugins, view logs, and troubleshoot issues with our firewall configuration.
For more PfSense-specific content please click on the PfSense tag at the top of the blog post to learn about some interesting things you can do with it.
For now, we’ll move on to Splunk Installation!
Splunk
The scope of this section will cover the installation of Splunk, but not the configuration. Select the Splunk tag to see posts related to Splunk configuration and search capabilities.
We’re going to install Splunk on a Linux server image which is essentially a Linux OS without a point-and-click GUI. We’ll download Ubuntu Server edition, and then install it on Virtualbox in a similar way to our PfSense installation.
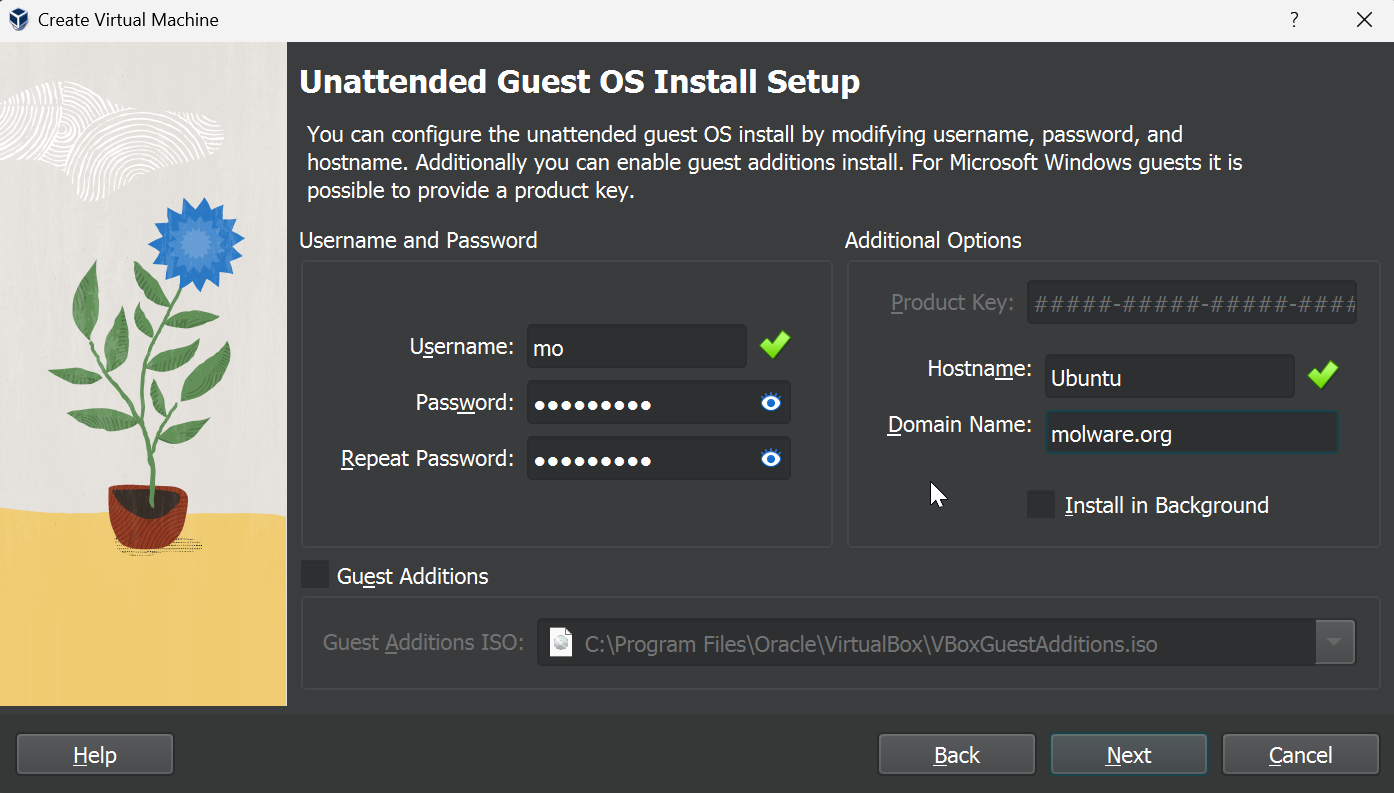
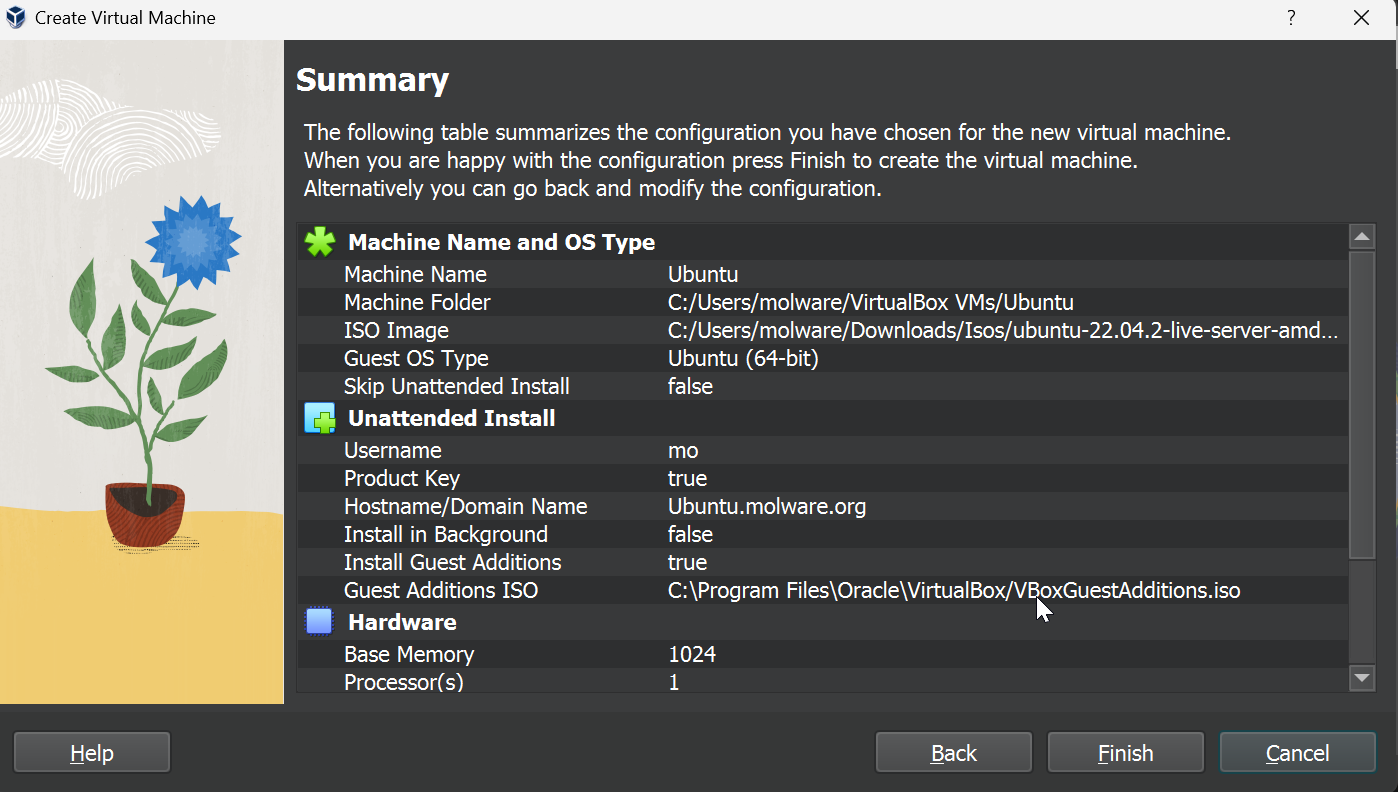
After downloading the iso, let’s go ahead and create a new Ubuntu Virtual Machine. Virtualbox should automatically detect the image type which helps streamline the installation process. If you have the “Unattended Install” box checked it will allow you to automatically create a user and set the hostname for the VM.
We’ll configure this VM with 1GB of RAM, 1 core, and 60 GB of storage since we expect our Splunk instance to collect a lot of data.
After saving, we should go to the VM settings and update the network adapter to be connected to our PfSense LAN via intnet1. We should also connect adapter 2 to intnet2 in order to make sure our Splunk instance has access to both LAN networks to receive logs. This is not necessary as we can manipulate our firewall rules to allow traffic to other subnets, but is my suggestion for those still learning.
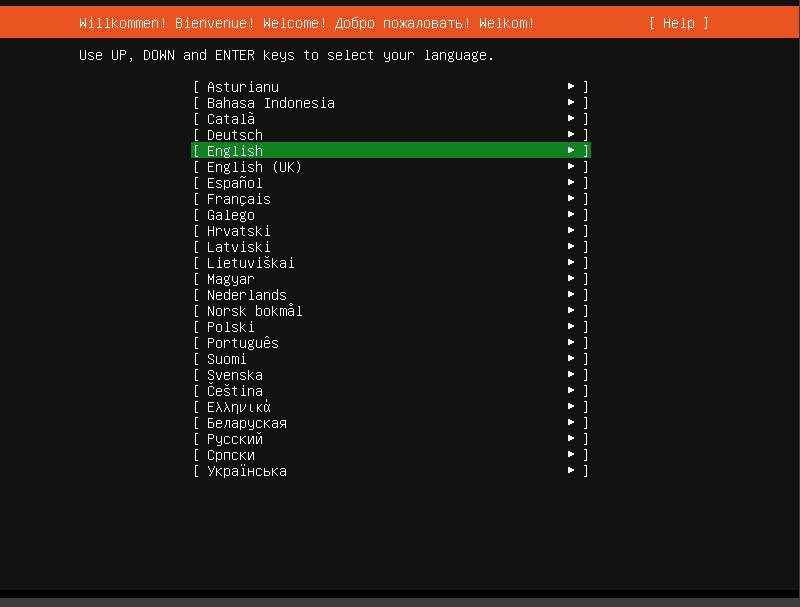
For our Ubuntu installation, we’ll follow all the defaults for configuration. The installation should be pretty straightforward and should only take a few minutes.
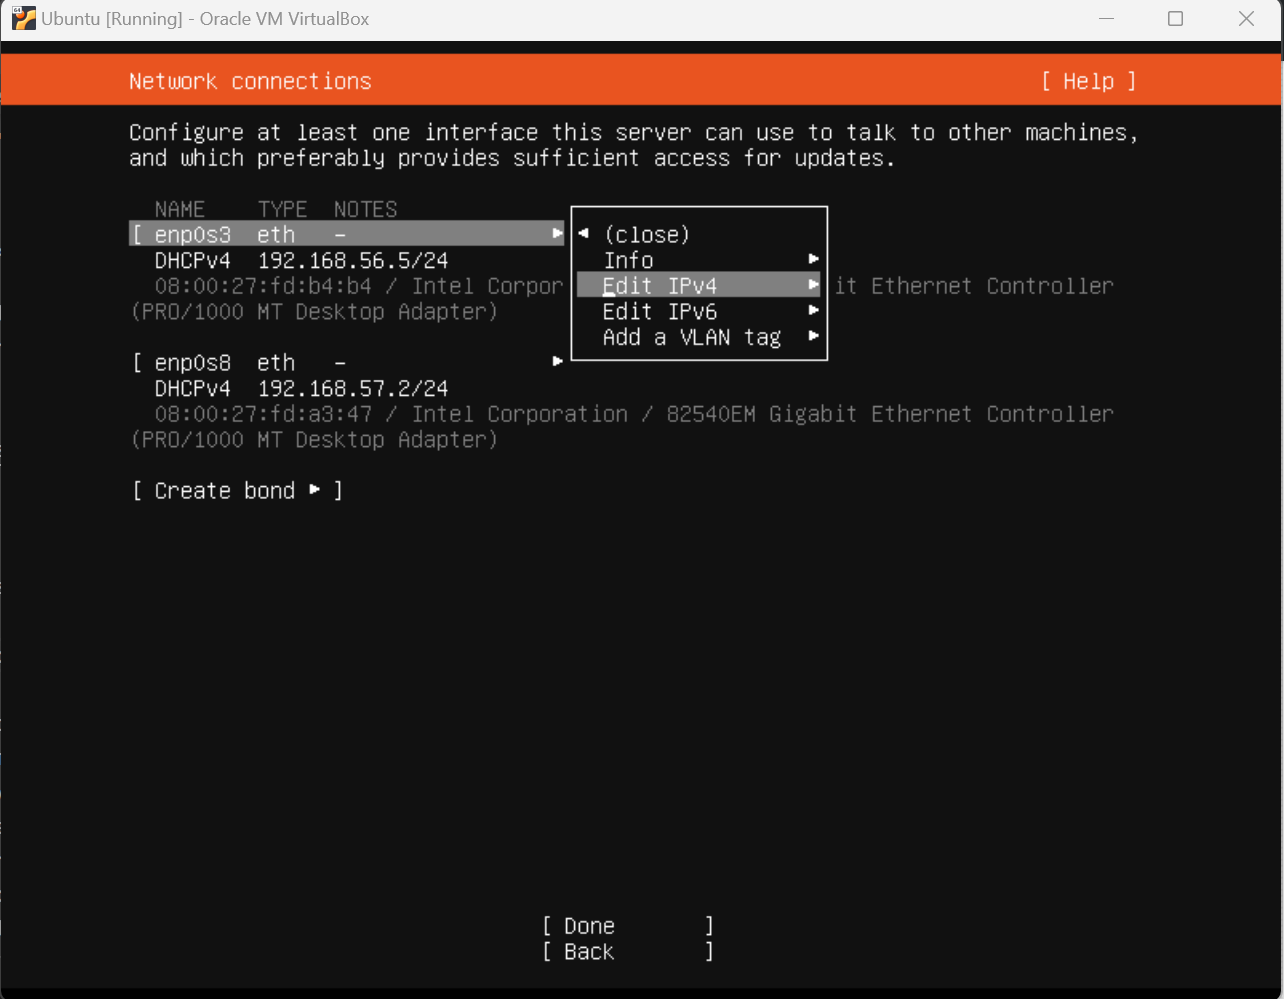
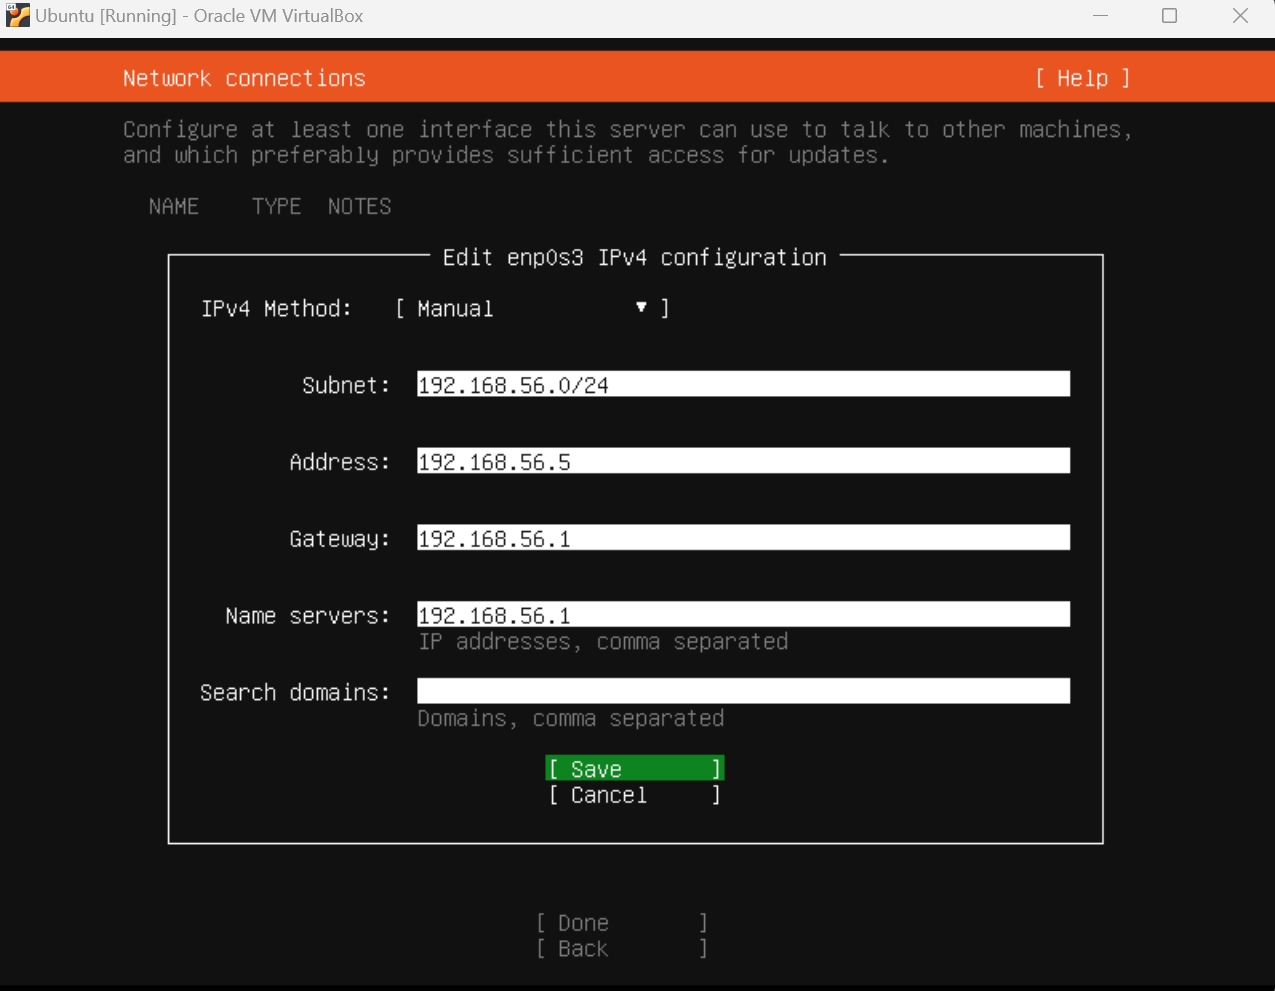
During the installation, be sure to configure a static IP address fo rboth network adapters so that your has an easy way to navigate to your Splunk console, and forward logs. We don’t want to use DHCP here because if our IP address keeps changing our logs won’t ship correctly and our console address will keep changing as well.
After the installation is complete Ubuntu will boot up to a command prompt where we can log in with the username and password we created previously.
To install Splunk we’ll navigate to the Splunk download page, and select “Download via Command Line (wget).” This will give us a wget command that we can paste directly into our container that will directly download the Splunk “.deb” package file.

In our VM we’ll run:
wget -O splunk-9.0.4.1-419ad9369127-linux-2.6-amd64.deb "https://download.splunk.com/products/splunk/releases/9.0.4.1/linux/splunk-9.0.4.1-419ad9369127-linux-2.6-amd64.deb"

dpkg -i splunk-9.0.4.1-419ad9369127-linux-2.6-amd64.deb
The second command installs the downloaded Splunk debian package for us. After installation let’s run the Splunk binary:
/opt/splunk/bin/splunk start
Splunk will ask us to agree to their license and create an admin user, and password. Afterward, Splunk will launch the web interface and host it on port 8000.

We can now use our Windows VM(or any other configured VM’s) to navigate to our Splunk web interface at the static IP we configured for Splunk earlier.
https://192.168.56.5:8000
After logging in we’re now able to use and administer our Splunk instance!

From here we can configure our Splunk to collect logs from our PfSense, Windows, and any other virtual machines we have in our lab environment. For more Splunk-specific content please click on the Splunk tag at the top of the blog post to learn about some interesting things you can do with it.
Some additional Virtualbox tips:
If you’d like to administer your firewall, and Splunk UI from your local machine rather than having to use a browser within a virtual machine, you can elect to use the Virtualbox “Host-Only adapter” instead of the “Internal Network” adapter. The Host-Only adapter does connect to your underlying host which will have an IP address of its own. Be sure to jot down the IP address of your host-only adapter so it doesn’t conflict with the addresses you assign to any of the NICs in your VM;s.
Virtualbox doesn’t have native docker support but you can install Docker on an Ubuntu VM. This will allow you to run docker containers in your homelab!
Wrapping Up
So we’ve built a very basic homelab in Virtualbox that allows us to have VM’s on separate LAN networks while also having a logging platform for doing analysis. This lab is scalable and will allow us to do tons of research and testing to learn how to secure networks and computer systems. As stated in my previous blog post, adding a Linux VM is a pretty good foundation and an easy way to expand upon this barebones lab setup.
There’s a lot of flexibility in this lab setup and you can certainly configure your lab setup however you see fit. My personal lab is actually on a separate firewalled LAN on my physical home network which allows me to use a type-2 hypervisor like VmWare to interact directly with the VM’s in my lab for scanning and launching attacks. There are tons of ways to configure and expand in your homelab and this is just a starting point to help you expand. Happy homelabbing!
To see more homelab posts, click the homelab tag at the top of the page.