Windows 11 is Microsoft’s latest Windows Desktop Operating System, built upon the Windows 10 platform. I’ve mainly been running Windows 10 in my lab environments, but figured it was high time I virtualized Windows 11 as well. Unfortunately, some nuances make installing Windows 11 in a VM a little bit tricky.
The first time I tried to install Windows 11 I was met with an error message on the install screen. Unfortunately, Microsoft has a very strict TPM requirement for Windows 11.
What is TPM?
TPM is a chip on a computer’s motherboard that servers a cryptoprocessor. Effectively, it is a piece of hardware that works to secure your hardware using cryptographic keys. It provides additional security to the boot process and also stores security keys and credentials that can be leveraged by your computer or the underlying operating system. As of Windows 11, Microsoft has made this a strict requirement for installing Windows 11.
TPM Virtualization
Now the issue I ran into when trying to install Windows 11 is that the hardware on my server has a TPM chip, but that chip is inaccessible to a virtualized operating system. This is typically a good thing since virtualization is intended to isolate and contain the virtual machines that you create.
Fortunately, Proxmox has support for virtualizing the TPM module in the virtual machine hardware settings.
Windows 11 Proxmox Guide
Download the Windows 11 ISO.
Windows 11 Download - Select the Iso Download Option
Windows 11 Enterprise Evaluation - 90-day evaluation of Windows Enterprise
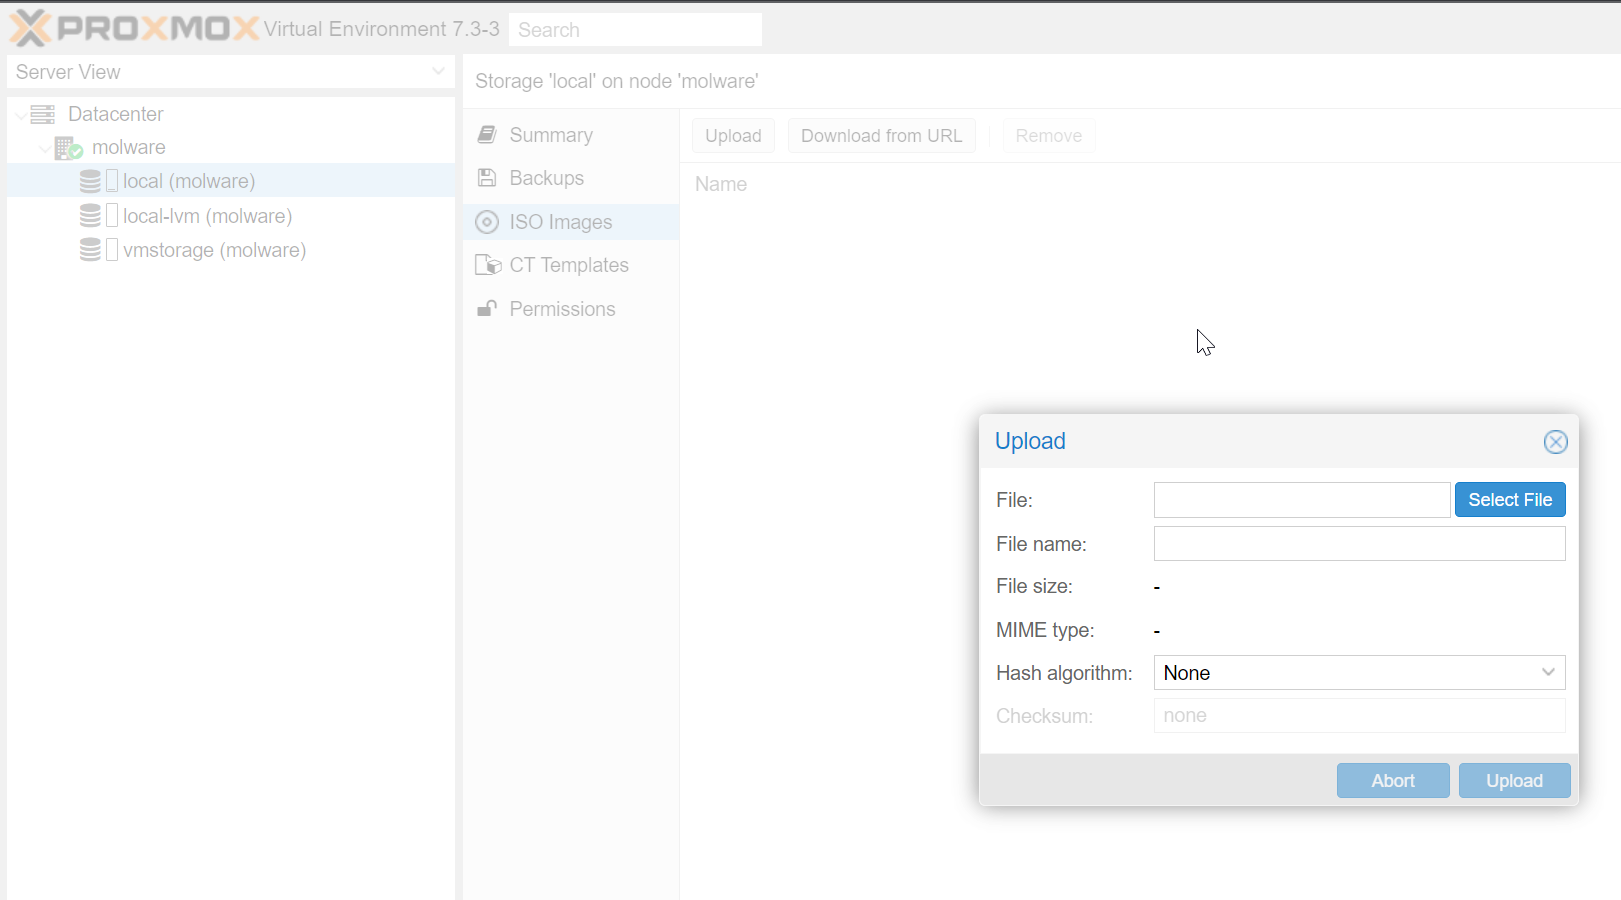
Upload the iso to Proxmox.
Create the Windows 11 VM.
Change the following settings:
- BIOS:
OVMF(UEFI) - Add EFI Disk:
YOURSTORAGELOCATIONHERE - Pre-Enroll Keys:
✔️ - SCSI Controller:
VirtIO SCSI single - Add TPM:
✔️ - TPM Storage:
YOURSTORAGELOCATIONHERE
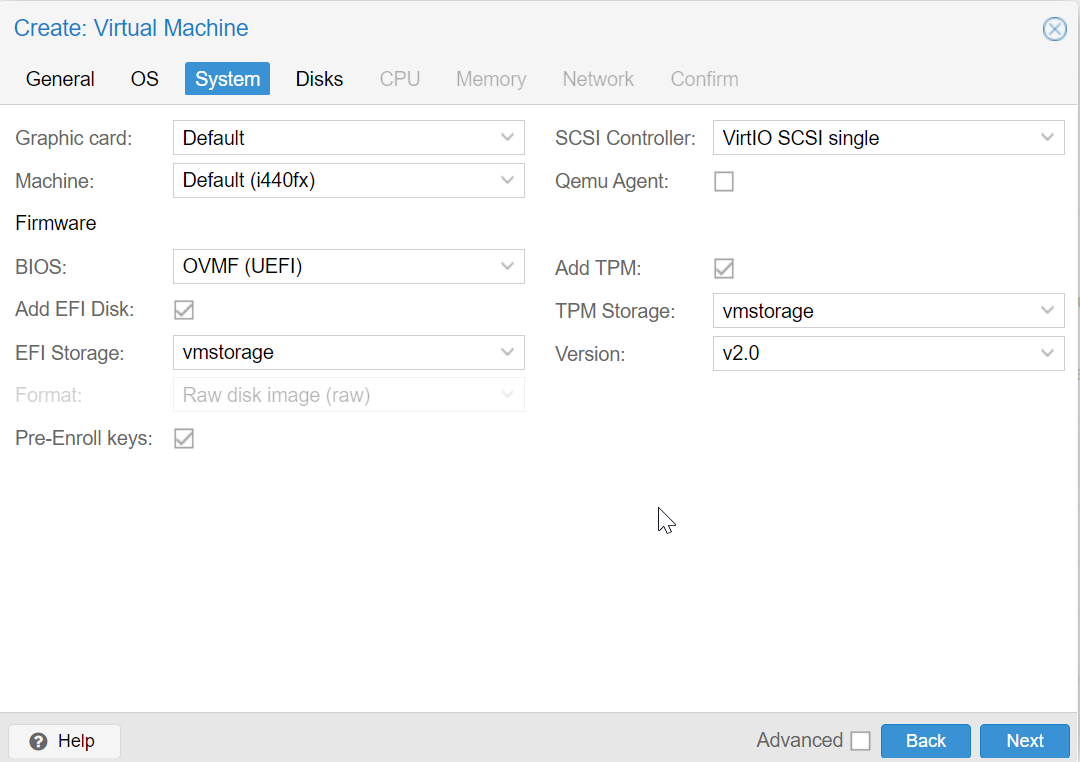
- Disk Size should be at least 64 GB
- Memory should be at least 4 GB
- CPU should have at least 2 cores assigned.
The end result should look like this:
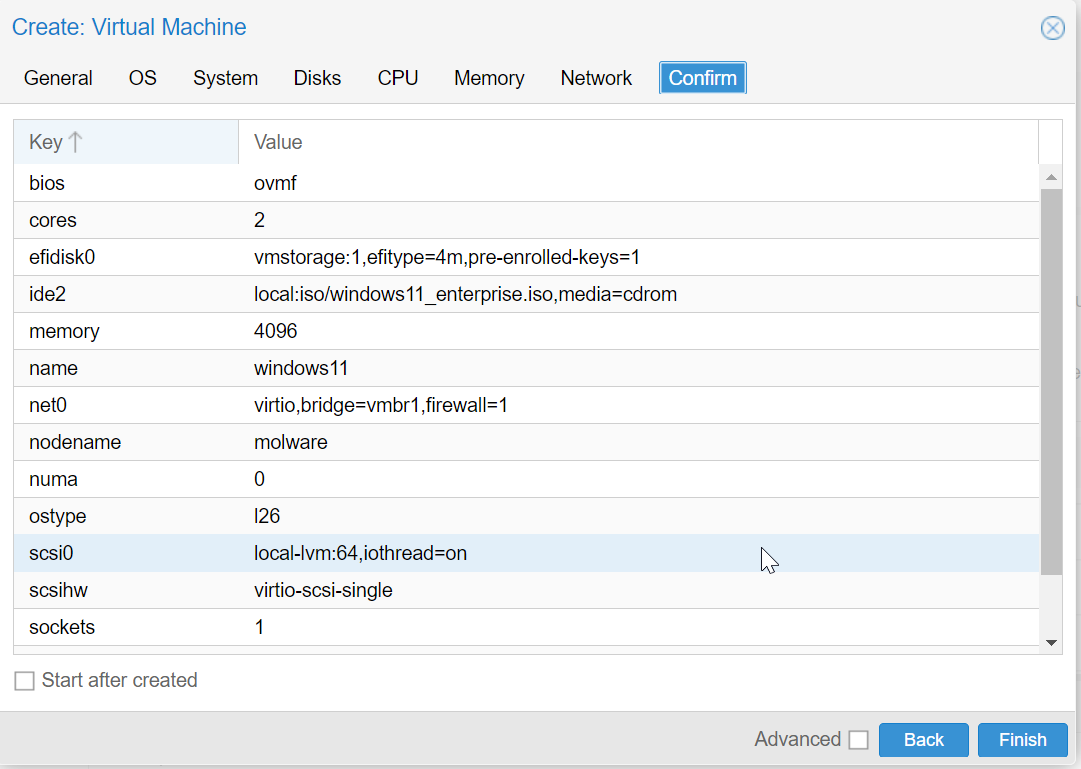
- BIOS:
Download Windows 11 VirtIO driver, and upload to Proxmox as an iso image.
Windows needs additional drivers to support the Virtual Hard Disk used in Proxmox(VirtIO).
You can directly download the drivers from here.
Sourced from the Proxmox Windows VirtIO Drivers page.
After downloading, upload the drivers as an iso image to Proxmox just like the Windows iso image that was previously uploaded.

Attach the VirtIO drivers to the Windows 11 VM as a CD.
In the settings for your recently created Windows VM, navigate to hardware options, and attach a new CD drive. Select the Virt IO drivers that were just uploaded.
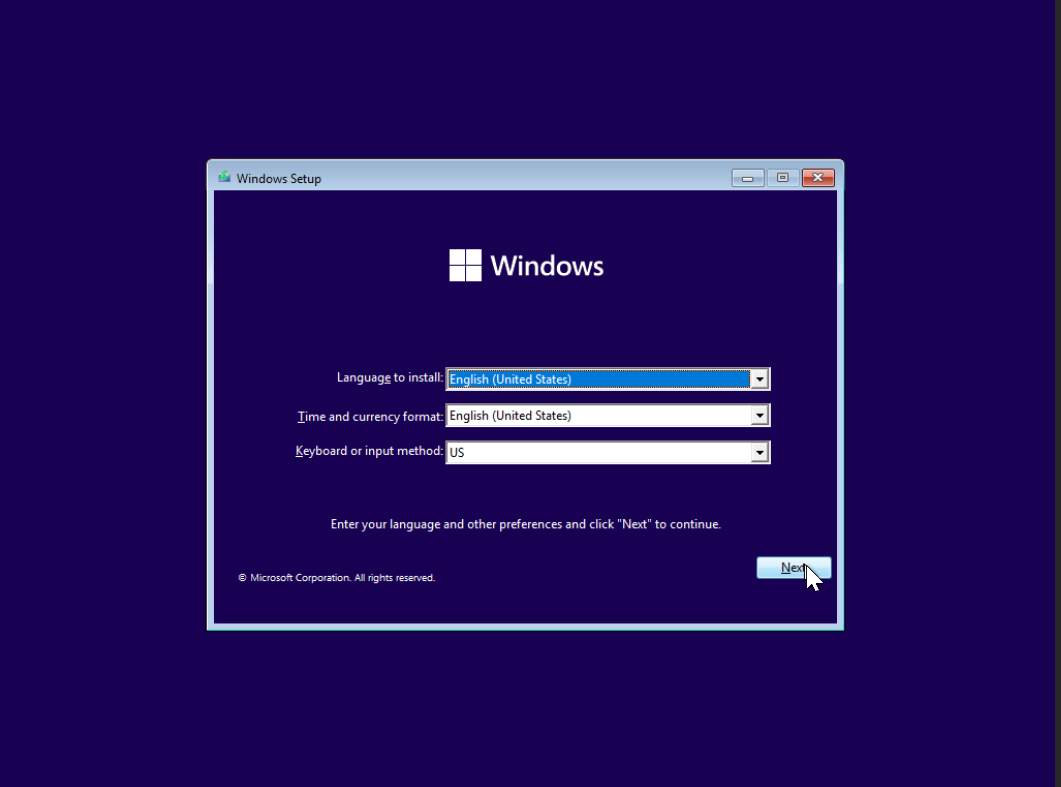
Launch the VM and start the Install Process.
Now that the drivers are attached you can launch the VM and the Windows Install process should start up.
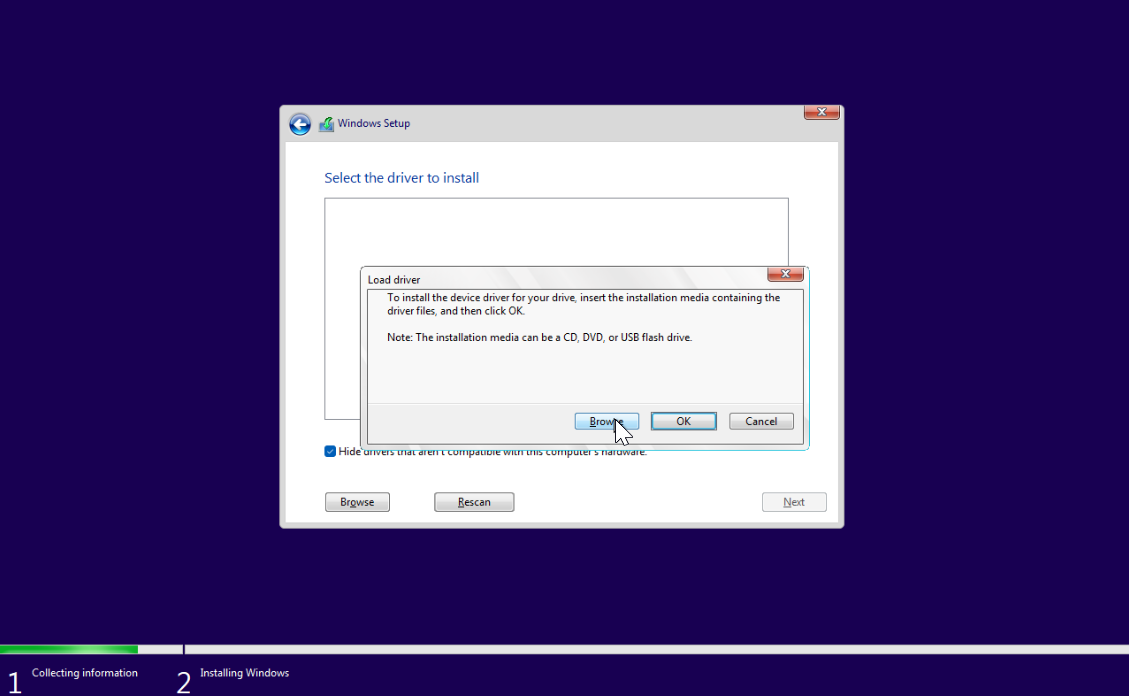
Load the VirtIO drivers.
When you reach the Windows Setup screen, select the option for Customized Install.

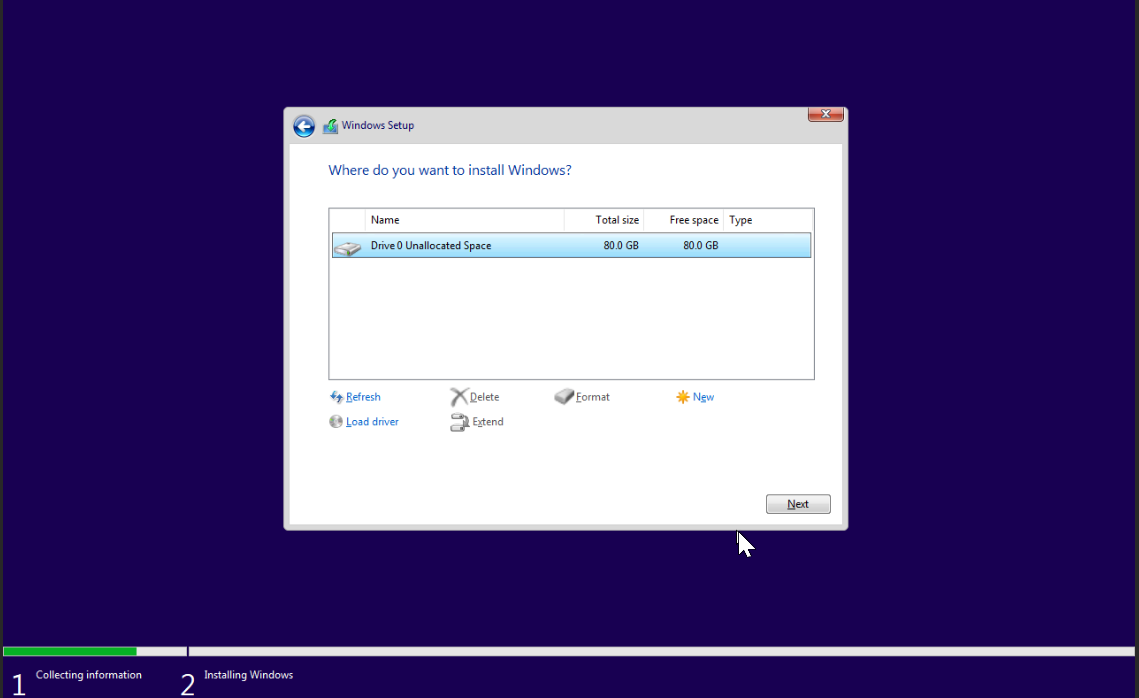
The target hard disk to install Windows won’t be available but that’s what the VirtIO driers are for. Select ‘Load Driver’ and then select OK and navigate to the VirtIO installation media.
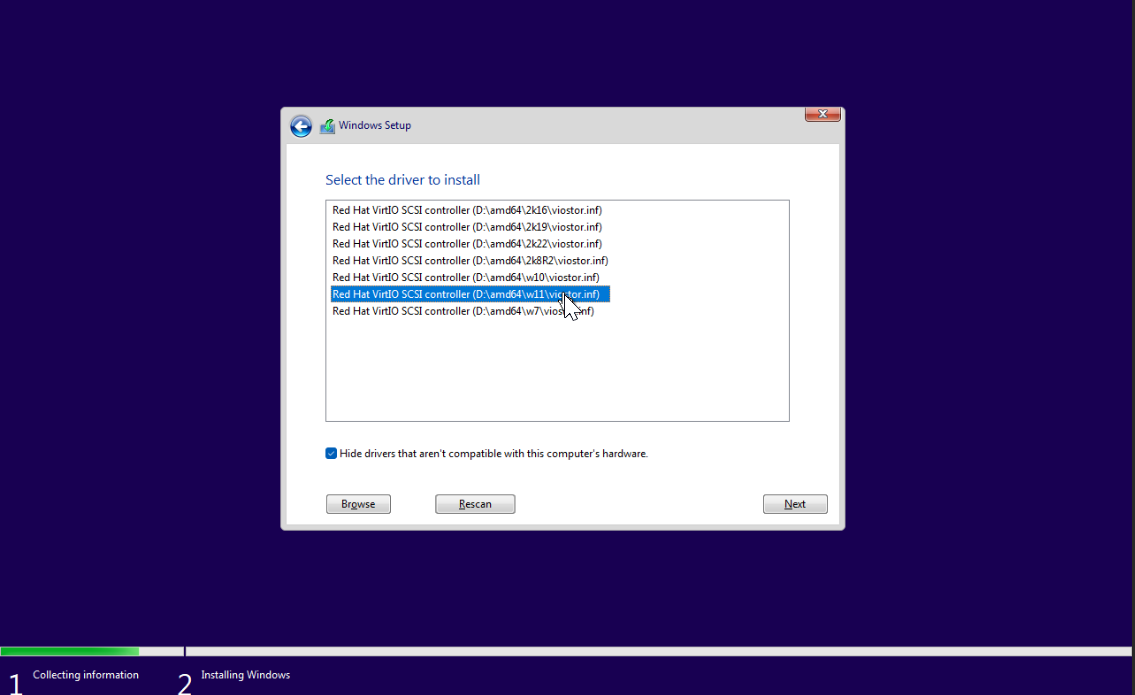
It should automatically load all the VirtIO drivers after you select the VirtIO disk. From this list, select the W11 drivers for Windows 11.
After the drivers are installed you should now see the virtual disk you created when initializing the VM. Select the disk and hit Next to begin your Windows installation.
Complete Installation and Enjoy your Windows 11 VM!
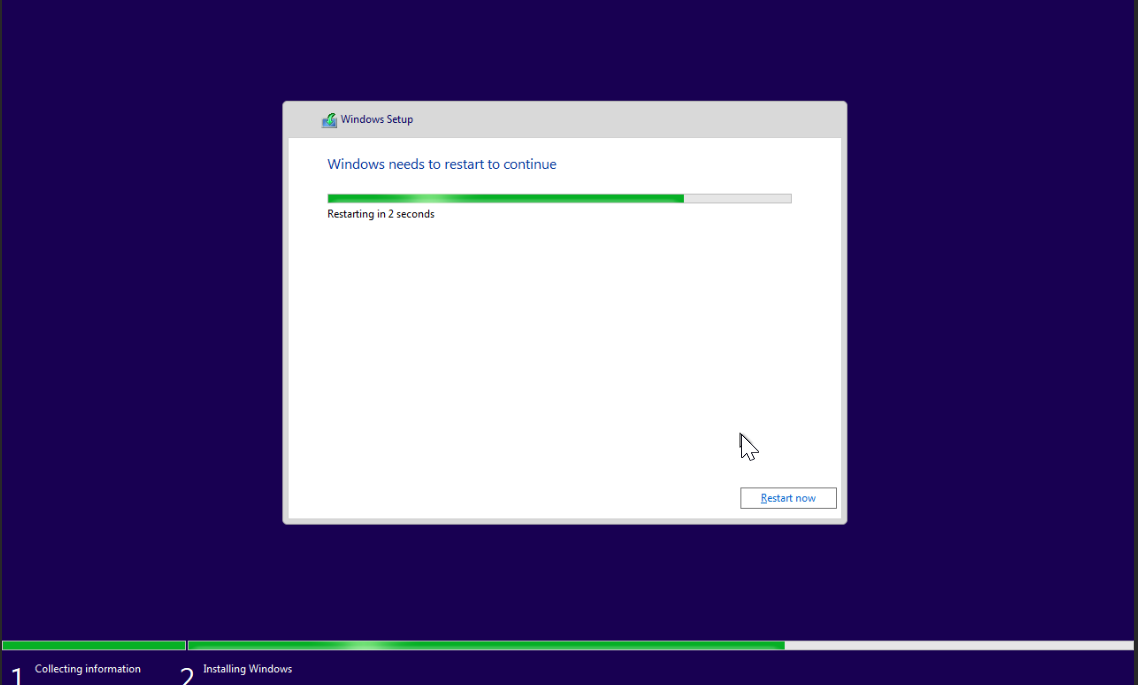
After the installation is complete, Windows will reboot and you’re ready to configure your new Windows 11 VM!